A Cool Summer Gazpacho

Summer arrived right on time this year in Paris and Provence and temperatures have recently been soaring into the high 90s. When temperatures are this high, I always reach for a recipe where I don't have to turn on an oven, and this one is a favorite as it's so cooling and so very simple to prepare. This is a slight variation on the emulsified soups master recipe, Red Tomato Gazpacho from My Master Recipes. An essential element of the book is to encourage you to first understand the fundamental techniques behind each recipe so that you are then free to switch out ingredients to create endless variations on the original. Recently, I couldn't resist using one of the gorgeous yellow ananas tomatoes from the market, and with all this hot weather the coriander in the garden has shot into flower, so I grabbed a handful to make use of my abundant stock. The result was a soup the color of a cantaloupe (not unlike the cover color of My Master Recipes!), flecked with green. What else do you need on a warm, summer's evening?!

Red Tomato Gazpacho

8 servings   |   Equipment: A blender, food processor or immersion blender 8 chilled, shallow soup bowls or glasses.

2 pounds (1 kg) ripe red tomatoes, rinsed, cored, cut into chunks  
1 small cucumber (about 6 ounces; 180 g) peeled, cut into chunks
1 small mildly hot pepper such as Anaheim, stemmed, cut into chunks
1 small red onion, peeled, cut into chunks
2 plump, fresh garlic cloves, peeled, halved, green germ removed if present
2 teaspoons best-quality red wine or sherry wine vinegar
1 teaspoon fine sea salt
1/2 cup (125 ml) mild extra-virgin olive oil

1.    In the blender, combine the tomatoes, cucumber, pepper, onion, and garlic. Blend at highest speed until well emulsified and very smooth, a full 2 minutes. With the motor running, add the vinegar and salt. Slowly drizzle in the olive oil, until the mixture is smooth, thick and emulsified.

2.    Cover and refrigerate until well chilled. Pour into chilled bowls or glasses to serve.
 
MAKE AHEAD NOTE: The soup can be prepared up to 3 days in advance and stored in an airtight container in the refrigerator. Re-blend at serving time.


This recipe was first published in My Master Recipes. All rights reserved. Please do not reproduce without permission.


Taste of the Week: Unsung star of the kitchen

I am not one for cluttering my kitchen with unnecessary kitchen gadgets. I prize my counter top and storage space, so every piece of equipment has to earn it's place. For me, the electric spice mill is an unsung star of the kitchen and has to rate among my top five favorite kitchen tools. It's of course essential for making my own spice mixes, but is also a dependable little machine for grinding, mixing and blending quantities too small for a blender or food processor, such as kaffir lime powder, dressings, sauces and pastes. It saves on the cleaning up too! A clever trick for cleaning after grinding spices is to grind a small quantity of rice, empty, and then wipe clean with paper towel.

What's your favorite kitchen gadget?


Taste of the week: Labeling your way to a more organized kitchen

La rentrée – the time of year in early September when France goes back to real life after a long, lazy summer break – is as much a formalized part of the year as Christmas or Easter. Kids are heading back to school, the papeteries (stationery shops) and supermarkets are piled high with stacks of notebooks, pens, diaries, ready to supply the nation with everything needed to start the new year. And while the only school I'll be attending is my cooking school, I always rejoice in a bit of annual reorganization. I round up unused utensils cluttering my kitchen and give them to friends, reorganize my cupboards after a month or two of hosting guests over the summer, and make sure my kitchen is in perfect order – not just so that my students can easily find their way around, but so that I can turn my hand to any task with a clear work space at my fingertips.

Strangely enough, one of my most frequently used items in my kitchen is not used for cooking. It's my label maker, the key to an orderly kitchen. Here are five ways in which labeling can transform your kitchen storage:

  1. Label and date anything that goes into your freezer, and also note it on a master list nearby. You think you'll remember what's in each container, but two months later, when the bag is frozen and your memory has faded, you'll be happy you have a well-marked inventory of your freezer contents.
  2. When storing leftovers in the fridge in glass or plastic containers, label the outside for clear identification. Then you're much less likely to leave perfectly good leftovers to languish at the back.
  3. Label spices and salts by jar in the same way. And if you like to renew your spices every six months, label the date of opening on the bottom of the jar.
  4. I always decant flours and grains into glass jars for storage. Labeling the jars makes for a much neater pantry, and helps avoid that moment when you're not sure if you're looking at self-raising flour, bread flour or plain flour. For grains, it's always useful to note the suggested cooking time and amount of water to cook in.
  5. If you have a lot of people coming through your kitchen like I do, labeling drawers and shelves for specific ingredients and cooking utensils is one of the best ways to make sure everything ends up back in its proper place at the end of the day.

Of course, you don't have to go out and buy a label maker, a roll of labeling tape and a sharpie can do the trick just as well. Happy organizing!

Taste of the week: Fig and almond tart

Picking figs is one of the greatest joys of my Provençal garden. I love the pure luxury of grabbing a plump ripe fig straight from a branch, tearing it open to reveal its ruby red seeded heart, and then devouring it right there beneath the tree's leafy canopy.

We have several varieties of fig trees on our property and they are such industrious little producers that I often have more figs than I know what to do with. Which is how I came to develop this recipe. My favorite is the ronde de Bordeaux, small figs with a deep purple, almost black exterior and a vibrant red interior, that are ideal for tarts and jams. I love to serve this tart with roasted fig sorbet.

Fig and Almond Tart

8 servings   |   Equipment:  A 10-inch (25 cm) tart pan with a removable bottom; a rolling pin; a baking sheet lined with baking parchment; a food processor.

A 14-ounce (400 g)all-butter puff pastry, thawed if frozen (see Note)
1 cup (80 g) almond meal (see Note)
5 tablespoons (2 1/2 ounces; 75 g) unsalted butter, at room temperature
1/3 cup (65 g) unrefined cane sugar, preferably organic, and vanilla scented
2 tablespoons (20 g) unbleached, all-purpose flour
1 egg yolk, preferably organic and free-range
1 tablespoon fig jam
35 to 40 (1 3/4 pounds; 875 g) small purple figs, stems trimmed
Confectioners’ sugar, for dusting

NOTES: •    In our tests, we have preferred Dufour brand frozen puff pastry, available at most specialty supermarkets. See www.dufourpastrykitchens.com. Be sure to leave ample time for thawing frozen dough, at least 6 hours in the refrigerator.

Almond meal (sometimes called almond flour) is made from whole, unblanched (skin-on) almonds. For this recipe, whole, unblanched almonds can be finely ground in a food processor. Do not over-process or you may end up with almond butter.

1.    Fold the pastry in half, transfer it to the tart pan and unfold it. Without stretching the dough, lift it up at the edges so that it naturally falls against the rim of the pan. With your fingertips, very delicately coax the dough onto the rim. There should be a generous overhang. With the rolling pin, roll over the top of the tin, trimming off the overhanging pastry to create a smooth, well-trimmed shell.

2.    Center a rack in the oven. Preheat the oven to 400°F (200°C). Place the tart shell on the baking sheet.

3.    In the food processor, combine the almond meal, butter, sugar, flour, egg yolk, and fig jam and process to blend. Transfer the almond mixture to the pastry shell. Smooth out the top with a spatula. Place in the oven and bake just until the pastry firms up and begins to brown, and the almond mixture browns, about 10 minutes. Remove from the oven.

4.    Cut an X in the top of each fig and gently squeeze from the bottom to open the fruit like a flower. Arrange the figs, cut side up, side by side on top of the almond mixture.

5.    Return the tart pan to the oven and bake until the figs and the filling are dark and bubbly, 20 to 25 minutes. Remove from the oven and transfer to a rack to cool. While the tart is still warm, sprinkle with confectioners’ sugar. After about 10 minutes, carefully remove the tart from the sides of the pan, leaving it on the pan base. Serve warm or at room temperature, cut into wedges. This tart is best served the day it is baked.

The secret: Use ripe, but not overly ripe figs, which tend to give up too much liquid and turn the pastry soggy.

Tip: Figs freeze beautifully. Treat them as you would berries: Arrange the whole fruit stem side up, side by side on a baking sheet, and place in the freezer. Once frozen, transfer to a zippered plastic bag and freeze for up to 3 months. For use, thaw at room temperature.


This recipe was first published in The French Kitchen Cookbook: Recipes and Lessons from Paris and Provence.

All rights reserved. Please do not reproduce without permission.

Taste of the week: Vanilla sugar

I always have vanilla-scented sugar on hand when making desserts, to give an injection of that warm, comforting aroma so perfectly suited to so many sweet dishes.

To make vanilla-scented sugar: Flatten one or several moist vanilla beans. Cut them lengthwise in half. With a small spoon, scrape out the seeds and place them in a small jar; reserve the seeds for another use. Fully dry the vanilla bean halves at room temperature. Place the dry halves in a large jar with a lid, and cover them with sugar. Tighten the lid and store for several weeks to scent and flavor the sugar. Use in place of regular sugar when preparing desserts.

A tip from my latest cookbook The French Kitchen Cookbook: Recipes and Lessons from Paris and Provence.

Taste of the week: Homemade molds

© Jeff Kauck

I love repurposing items, particularly packaging, into something useful in my kitchen. And why buy expensive stainless steel kitchen molds when you can just make them out of an empty tomato paste can? Simple remove the top and bottom of the can and you have an instant mold to make dishes like this gorgeous tomato tartare (you can find the recipe in The French Kitchen Cookbook).


Taste of the week: Tomato Tatins

Tomato Tatins © Jeff Kauck

Now that summer is in full bloom, it's a race against time to use all the tomatoes I have growing in my garden. This recipe, which I developed in my farmhouse kitchen with good friend Jeffrey Bergman, is a favorite way to get tomatoes on my table. It's a deceptive recipe, quite simple to execute but with the marvellous outcome of 'did I really create this beauty?!'. The key here is the balance of sweet and acid. The shallots and vinegar, as well as the touch of caramel, are essential to creating a dish full of contrasting flavors.


Tomato Tatins

Serves 8   |     Equipment: Three baking sheets; eight 1/2 cup (125 ml) ramekins; a 3 1/2-inch (8.75 cm) pastry cutter.

Tomatoes

3 pounds (1.5 kg) small, firm, garden-fresh red heirloom tomatoes (about 15)
Fine sea salt
Extra-virgin olive oil spray

Pastry

A 14-ounce (400 g) homemade or purchased all-butter puff pastry, (thawed if frozen) (see Note)

Shallots

4 large shallots peeled, halved lengthwise, and cut into thin half-moons
2 teaspoons extra-virgin olive oil
1/2 teaspoon salt
1/2 teaspoon ground Espelette pepper or other mild ground chile pepper
2 tablespoons red wine vinegar

Caramel

1/2 cup (100 g) white, refined sugar (do not use dark, unrefined cane sugar)
4 teaspoons water
1/8 teaspoon freshly squeezed lemon juice


16 fresh basil leaves, plus more leaves for garnish
1/4 cup (25 g) freshly grated Parmigiano-Reggiano cheese


1.    Roast the tomatoes: Center a rack in the oven. Preheat the oven to 275°F (135°C).  

2.    Core the tomatoes and halve them crosswise (at the equator.) Arrange the tomatoes, cut side up, side by side, on the baking sheet. Sprinkle lightly with salt. Spray lightly with oil. Place the baking sheet in the oven and bake until the tomatoes have shrunk by about one-third, 1 1/2 to 2 hours. This is an important step to condense tomato flavor and reduce moisture. (The tomatoes can be baked up to 1 day in advance, stored in an airtight container, and refrigerated.)

3.    Prepare the pastry: With the pastry cutter, cut out 8 rounds of pastry. Arrange the rounds side by side on a baking sheet. With a fork, prick the pastry. (The pastry rounds can be prepared up to 8 hours in advance. Cover and refrigerate.)

4.    Prepare the shallot mixture: In a small saucepan, combine the shallots, oil, and 1/2 teaspoon of salt. Stir to coat the shallots with the oil. Sweat – cook, covered, over low heat, stirring frequently, until the shallots are soft and translucent – about 5 minutes. Add the Espelette pepper and the vinegar. Increase the heat to medium high and cook until the vinegar has evaporated, but the mixture remains moist. Taste for seasoning. (The shallots can be prepared up to 1 day in advance, stored in an airtight container and refrigerated.)

5.    Prepare the caramel: In a medium saucepan, combine the sugar, water, and lemon juice and bring to a boil over high heat. Reduce heat to medium and cook undisturbed until sugar begins to caramelize, about 1 minute.  Pay close attention as the caramel will deepen in color quickly at this stage.  Swirl the pan gently and cook until the caramel is a deep amber, about 1 minute more.  Spoon a generous tablespoon of the caramel into the ramekins and tilt the ramekins so that the caramel evenly coats the bottom. (This can be done up to 8 hours in advance. Store at room temperature.)


6.    Bake the tatins: About 30 minutes before baking the tatins, center a rack in the oven. Preheat the oven to 375°F (190°C).

7.    Arrange the caramel-coated ramekins side by side on a baking sheet. Place 2 or 3 tomato halves, cut side up, into each ramekin. Press down on the tomatoes so that they fit snugly into the ramekins. Spoon the shallot mixture on top of the tomatoes. Place 2 basil leaves on top of the shallots.  Sprinkle with the cheese.

8.    Place a round of chilled pastry on top of each ramekin and tuck the dough around the tomatoes. Place the baking sheet in the oven and bake until the pastry is puffed and golden and the tomatoes are bubbling around the edges, 25 to 35 minutes. Remove the baking sheet from the oven and transfer the ramekins to a rack to cool for at least 2 minutes.

9.    Carefully invert each tatin onto an individual salad plate. Serve slightly warm or at room temperature, garnished with basil leaves. (The tatins can be prepared up to 8 hours in advance, stored at room temperature.)


Note: In our tests, we have preferred Dufour brand frozen puff pastry, available at most specialty supermarkets. See www.dufourpastrykitchens.com (I have no affiliation with this brand, this is purely a personal preference).

Be sure to leave ample time for thawing frozen dough, at least 6 hours in he refrigerator.


This recipe was first published in The French Kitchen Cookbook. Buy the book here.

All rights reserved. Please do not reproduce without permission.

Taste of the week: Cobb Salad

My Cobb Salad  © Jeff Kauck

In mid summer, it is a fresh, crunchy salad that will get me through the day. This American classic is a favorite with the crunch of the iceberg and scallions, the soft richness of the avocado, the saltiness of the bacon, the sweetness of the tomato, the bite of the blue cheese – this salad has it all!  And it is beautiful to boot.


My Cobb Salad: Iceberg, Tomato, Avocado, Bacon, Blue Cheese. and Scallions 

4 servings

2 1/2 ounces smoked bacon, rind removed, cut into matchsticks (3/4 cup)
1 head iceberg lettuce, chopped
2 ripe heirloom tomatoes, cored, , peeled, seeded and chopped
1 large, ripe avocado, halved, pitted, peeled, and cubed
4 ounces chilled blue cheese (preferably Roquefort), crumbled (1 cup)

4 small spring onions or scallions, white part only, trimmed, peeled and cut into thin rounds
Lemon-Yogurt Dressing (below)
Coarse, freshly ground black pepper


1.    In a large, dry skillet, brown the bacon over moderate heat until crisp and golden, about 5 minutes. With a slotted spoon, transfer the bacon to several layers of paper towel to absorb the fat. Blot the top of the bacon with several layers of paper towel to absorb any additional fat. Set aside.


2.    In a large shallow bowl, combine the bacon, lettuce, tomatoes, avocado, blue cheese, and spring onions. Toss with just enough Lemon-Yogurt Dressing to lightly and evenly coat the ingredients. Season with plenty of coarse, freshly ground black pepper and serve.

Yogurt-Lemon Dressing

Makes about 3/4 cup   |   Equipment: A small jar, with a lid.   

1/2 cup plain low-fat yogurt
2 tablespoons freshly squeezed lemon juice
1/4 teaspoon Lemon Zest Salt or fine sea salt

In the jar, combine the yogurt, lemon juice and salt. Cover with the lid and shake to blend. Taste for seasoning.  The dressing can be used immediately. (Store the dressing in the refrigerator for up to 1 week. Shake to blend again before using.)  

This recipe was first published in Salad as a meal. Buy the book here.

All rights reserved. Please do not reproduce without permission.

Taste of the week: Where to eat in Paris


I never like to say there is the perfect restaurant when it comes to dining out in Paris. So much comes into play when chosing where to eat – season, weather, who you're dining with, the kind of mood you're in, your budget. But I do have a list of favorite places which I find myself going back to again and again, because I always come away feeling inspired and like it has been time and money worth spent. Here are a few must-try addresses that currently top my list, for all budgets and moods. I'll be updating this list from time to time, here on my website.


Restaurants
 

Bistrot Paul Bert: Classic French Bistro

This here is the quintessential Parisian bistrot that remains completely authentic and honest despite its wild popularity.

18 rue Paul Bert   |   Paris 11   |   +33 1 43 72 24 01   |   Metro: Faidherbe-Chaligny or Rue des Boulets   |   Open Tuesday - Saturday. Closed Sunday, Monday and August.

 
Le Servan
: Casual Modern Bistro

Casual Parisian bistro dining at its best – Le Servan has a great neighborhood vibe, the food is simple but interesting, the ingredients impeccably fresh, and the price very reasonable.

32 rue Saint-Maur   |   Paris 11   |   +33 1 55 28 51 82   |   Metro: Saint-Ambroise, Rue Saint-Maur or Père Lachaise   |   Open Monday dinner-Friday. Closed Saturday, Sunday and Monday lunch.

 
Le Severo: Classic bistro

A carnivore's dream – owner William Bernet, a former butcher, really knows his meat and even has his own aging cellar beneath the restaurant. Don't go near this place if you are a vegetarian.

8 rue des Plantes   |   Paris 14   |   +33 1 45 40 40 91   |   Metro: Alésia or Mouton-Duvernet   |   Open Monday-Friday. Closed Saturday and Sunday.

 
Porte 12
: Modern French

This has all the elements of great dining in the capital: bright contemporary decor, sincere attentive service, and sophisticated, signature fare.

12 rue Messageries   |   Paris 10   |   +33 1 42 46 22 64   |   Metro: Possionnière   |   Open for lunch Tuesday - Friday, dinner Tuesday - Saturday. Closed Saturday lunch, Sunday, Monday and public holidays.

 
La Table d'Akihiro
: Modern French

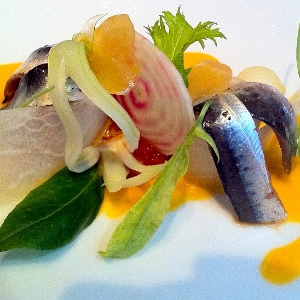
Akihior Horikoshi, worked in the kitchen of 3 Michelin starred L'Amboisie, before opening his own fish and seafood restaurant. The influence of this pedigree is clear and his seductive cuisine is always elegant and worthy of the effort it takes to secure a table at this post stamp-sized restaurant.

49 rue Vaneau   |   Paris 7   |   +33 1 45 44 43 48   |   Metro: Vaneau or François-Xavier   |   Open Tuesday-Saturday. Closed Sunday and Monday

 
Ze Kitchen Galerie: Modern French | International

I never get tired of dining on chef William Ledeuil's creative, inspiring cuisine, based on traditional French training, injected with a modern international flare and a love for Asian ingredients.

4 rue des Grands Augustins   |   Paris 6   |   +33 1 44 32 00 32   |   Metro: Saint-Michel or Pont Neuf   |   Open Monday-Saturday. Closed Saturday lunch and Sunday.

 
Astrance: Modern French |  Haute Cuisine

A magician in the kitchen, Pascal Barbot never fails to inspire me with his ethereal nuanced dishes. His 70€ week day lunch menu is one of the best buys in the city.

4 rue Beethoven   |   Paris 16   |   +33 1 40 50 84 40   |   Metro: Passy   |   Open Tuesday - Friday. Closed Saturday,  Sunday and Monday

 
L'Atelier de Joël Robuchon Saint-Germain
: Modern French | Haute Cuisine

Always at the forefront of innovation, Joël Robuchon in my opinion is the best chef cooking today. I am always happy to sample whatever Chef Axel in his Saint-Germain atelier suggests.

5 rue Montalembert   |   Paris 7   |   +33 1 42 22 56 56   |   Metro: Rue du Bac   |   Open daily 11:30am-3:30pm and 6:30pm-midnight

 
 Shops

 
Jacques Genin
: Chocolate maker

Truly one of the finest chocolate makers in France. Not to be missed for chocolate lovers.

133 rue de Turenne   |   Paris 3   |  +33 1 45 77 29 01   |   Metro: République or Filles-du-Calvaire   |   Open Tuesday - Sunday 11am-7pm, Saturday 11am-8pm. Closed Monday and August.

27 rue de Varenne   |   Paris 7   |   +33 1 53 71 72 21   |   Metro: Rue du Bac, Sèvres Babylone or  Varenne   |   Open Tuesday - Saturday 10.30am-7pm. Closed Sunday and Monday.

 
La Derniere Goutte
: Wine shop

Owner Juan Sanchez has a rare palate, and carefully sources his selection of largely organic and biodynamic wines from small independent wine makers. For those curious to learn more Juan holds regular tastings at the shop.

6 rue Bourbon le Château   |   Paris 6   |   +33 1 43 29  11 62   |   Metro: Saint-Germain des Près, Mabillon or Odéon   |   Open Daily:  Sunday 11am-7pm, Monday 3-8pm, Tuesday-Friday 1:30am-1:30pm and 3-8pm, Saturday 10:30am-8pm

 
Quatrehomme
:  Cheese Monger

Marie Quatrehomme was one of the first women to be awarded the Meilleur Ouvrier de France title, and her dedication to quality shines through in her well-tended shop, one of the finest in France. Whether you know a lot or a little about cheese, her shop is always educational.

62 rue de Sèvres   |   Paris 7   |   +33 1 47 34 33 45   |   Metro: Vaneau or Duroc   |   Open Tuesday - Thursday 8.45am-1pm and 4-7.45pm, Friday and Saturday 8.45am-7.45pm. Closed Sunday and Monday.

 
Poîlane
: Bakery

Known for their country sourdough loaves, to my mind and palate, they make the best bread there is. My Paris cooking class includes a visit to the wonderful, flour-dusted underground cellar to watch the famous loaves being kneaded, shaped and then baked in the ancient wood burning oven.

8 rue du Cherche-Midi   |   Paris 6   |   Metro: Sèvres-Babylone or Saint-Sulpice   }   Open Monday - Saturday 7.15am-8.15pm. Closed Sunday.

 
Market

 
Marché President Wilson: Roving market

This is the market I bring my students to. It is the market that Parisians will cross town for.

avenue Président Wilson, between rue Debrousse and place d'Iéna   |   Paris 16   |   Metro Alma-Marceau or Iéna   |   Open Wednesday and Saturday 8:30am-1pm


For the complete reviews of these addresses and for other recommendations, get The Food Lover's Guide to Paris 5th edition book or the App for the iPhone (also works on the iPad).

Taste of the week: Yveline's chilled cucumber and avocado soup with avocado sorbet

                                              Chilled Cucumber and Avocado Soup  ©Jeff Kauck

On hot weather days, is there anything better than a cold, no-cook soup? This zesty and refreshing recipe is a favourite that my friend and neighbor Yveline came up with. It's now a perenial favorite at our summertime lunch table.


Yveline’s Chilled Cucumber and Avocado Soup

Serves 8   |    Equipment: A blender or a food processor.  

1 large European cucumber (about 1 pound; 500 g), chopped (do not peel)
2 large ripe avocados, halved, pitted, peeled, and cubed
2 cups (500 ml) chicken or vegetable stock (best quality you can find, or homemade if you can)
1 cup (45 g) chopped cilantro leaves
1 teaspoon fine sea salt   
Grated zest and juice of 1 lime, preferably organic
Avocado Sorbet (recipe below; optional)

1.    In the blender or food processor combine the cucumber, half of the cubed avocado, the stock, 3/4 cup (34 g) of the cilantro and the salt, and process to blend. Taste for seasoning. Chill for at least 1 hour and up to 24 hours.

2.    At serving time, garnish with the remaining 1/4 cup cilantro, the rest of the avocado, the lime juice and zest.  If using, ass a spoonful of the sorbet to each bowl.

Note: Using a blender rather than a food processor will give you a much smoother, more velvety consistency.


Avocado Sorbet

8 servings   |   Equipment: A blender or a food processor; an ice cream maker.

2 large, ripe avocados, halved, pitted, and peeled
2 cups (500 ml) Greek-style plain whole-milk yogurt
2 teaspoons freshly squeezed lime or lemon juice
1/4 teaspoon ground Espelette pepper or other mild chile pepper
1/4 teaspoon fine sea salt
1 teaspoon honey
2 tablespoons invert sugar syrup or light corn syrup

1.    Combine all the ingredients in the blender or food processor. Blend until completely smooth, 1 to 2 minutes. Taste for seasoning. Chill completely.

2.    At serving time, transfer the chilled mixture to the ice cream maker and freeze according to the manufacturer’s instructions. For best results, serve the sorbet as soon as it is frozen.


These recipes were first published in The French Kitchen Cookbook. Buy the book here.

All rights reserved. Please do not reproduce without permission.

Taste of the week: Chicken fricassée with fennel, capers, artichokes, and tomatoes

This recipe is a one-pot wonder, ideal for week night family dinners, or casual get togethers with friends. It's a rustic and hearty dish, yet the artichokes and fennel give it a lift of sophistication. It requires minimal effort to throw together, and can easily be made in advance and reheated at serving time. Serve with rice, pasta or polenta


Chicken Fricassée with fennel, capers, artichokes and olives

6 servings   |    Equipment: A large, deep skillet or Dutch oven, with a lid.

1 farm-fresh chicken (3-4 pounds; 1.5-2 kg), preferably organic and free range,  cut into 8 serving pieces, at room temperature
Fine sea salt
Coarse, freshly ground black pepper
3 tablespoons extra-virgin olive oil
2 onions, peeled, halved and thinly sliced
2 fennel bulbs, trimmed and thinly sliced   
1 cup (250 ml) white wine
1 28-ounce (794 g) can diced Italian tomatoes in juice
1 cup (115 g) green Picholine olives, pitted
1 cup (115 g) brine-cured black olives, pitted
1/4 cup (60 ml) capers in vinegar, drained
12 artichoke hearts marinated in olive oil, drained
Cooked rice, fresh pasta, or polenta for serving


1.    Liberally season the chicken on all sides with salt and pepper.

2.    In the large, deep skillet, heat the oil over moderate heat until hot but not smoking. Add the chicken pieces (in batches if necessary) and brown until they turn an even golden color, about 5 minutes. Turn the pieces and brown them on the other side, 5 minutes more. Carefully regulate the heat to avoid scorching the skin. When the pieces are browned, use tongs (to avoid piercing the poultry) to transfer them to a platter.

3.    Reduce the heat to low, add the onions and fennel to the skillet and sweat  – cook, covered, over low heat – until soft but not browned, about 10 minutes. Return the chicken to the skillet. Add the wine, tomatoes (with juices), olives, capers and artichokes. Cover and simmer over low heat until the chicken is cooked through. About 30 minutes. Taste for seasoning. Serve with rice, fresh pasta or polenta.


This recipe was first published in The French Kitchen Cookbook. Buy the book here.

All rights reserved. Please do not reproduce without permission.

Taste of the Week: Mini croque monsieur

            Ham and cheese squares   ©Jeff Kauck

I love to serve these small grilled ham and cheese squares, brightened by the tart crunch of a cornichon, as a fun palate opener when we have guests over. Assemble these baby croque monsieur sandwiches (not the classic version in the strictest sense as I have removed the bechamel sauce for a lighter summer touch) earlier in the day and then grill them at the last minute, when family and friends are gathering.


Ham and Cheese Squares (mini croque monsieur)

Makes 18 squares, to serve 6 to 8   |    Equipment: A toaster; a nonstick skillet; toothpicks.

4 slices Honey and Saffron Brioche or white bread (pain de mie) crusts removed
2 teaspoons French mustard
2 thin slices best-quality cooked ham, cut to fit 2 slices of the bread
About 1/4 cup (30 g) freshly grated Swiss Gruyère cheese or other hard cheese
1 tablespoon (15 g) clarified butter or unsalted butter
9 cornichons, halved lengthwise

1.    Toast the brioche or bread. Coat one side of each slice with the mustard. Place a slice of ham over the mustard on two sides of the slices. Sprinkle the cheese over the ham. Place the other slices of bread, mustard-coated side down, on top of the cheese.  

2.    In the skillet, melt the butter over low heat.  Brown the bread evenly on both sides, about 1 minute per side. Cut each sandwich into 9 even squares. Pierce each cornichon half with a toothpick and secure the toothpick to the grilled bread. Arrange on a serving platter and serve warm, offering guests cocktail napkins.

Wine suggestion: Grilled cheese and champagne? Why not? I love Pierre Moncuit’s blanc de blancs, a medium-bodied, clean, and always reliable offering that has a purity that matches just about any opening taste.


This recipe was first published in The French Kitchen Cookbook. Buy the book here.

All rights reserved. Please do not reproduce without permission.

Taste of the week: Ruby rhubarb bars

In France, rhubarb appears fleetingly in the markets in May and June, just in time to be paired with gariguette or charlotte strawberries, before disappearing for another year. In this dish however, rhubarb is the sole star, the shining tart crown atop a warm pastry crust.

Both green and red rhubarb can of course be used for this dish, but it's the red varieties that really leaves an impression visually if cooked properly. So often it can lose its gorgeous ruby hue as it cooks but the trick is not to precook the stems and instead bake them in extra-thin slices, so they cook quickly and retain their shape and bright red color.

Ruby Rhubarb Bars

Equipment: A 9 1/2  x 9 1/2-inch (24 x 24 cm) baking pan   |   baking parchment   |   a food processor.

Pastry
4 tablespoons (60 g) salted butter, chilled
1 cup (140 g) unbleached, all-purpose flour
1/3 cup (65 g) confectioners’ sugar
Grated zest of 1 lemon, preferably organic
1/2 teaspoon fine sea salt   
2 tablespoons plain nonfat yogurt

Topping:
3/4 cup (150 g) unrefined cane sugar, preferably organic, vanilla scented (see Note)
1/4 cup (40 g) unbleached, all-purpose flour
4 large egg whites, preferably organic and free range
3 cups (300 g) thinly sliced red rhubarb stalks, (about seven 10-inch; 26 cm)


1.    Center a rack in the oven. Preheat the oven to 400°F (200°C).
 
2.    Line the baking pan with two pieces of baking parchment, letting the parchment hang over the sides. (This will make it easier to remove the dessert once baked.)

3.    Prepare the pastry: In the food processor, combine all the pastry ingredients and process to blend. The mixture should be soft and pliable.

4.    Press the dough evenly into the bottom of the baking pan. Place the pan in the oven and bake until firm, about 12 minutes.

5.    While the pastry is baking, prepare the topping: In a bowl, combine the sugar, flour, and egg whites and whisk to blend. Add the rhubarb and stir to coat it evenly with the egg-white mixture.

6.    Remove the pan from the oven and spoon the rhubarb mixture over the warm pastry. Return the baking pan to the oven and bake until the topping is firm and golden, 35 to 40 minutes. Remove from the oven and let cool. Remove from the pan and cut into 16 squares. Serve at room temperature. (Store in an airtight container at room temperature for up to 3 days.)

Note: to make vanilla-scented sugar: Flatten 1 or several moist vanilla beans. Cut them in half lengthwise. With a small spoon, scrape out the seeds and place them in a small jar; reserve the seeds for another use. Fully dry the vanilla bean halves at room temperature. Place the dry halves in a large jar with a lid, and cover them with sugar. Tighten the lid and store for several weeks to scent and flavor the sugar. Use in place of regular sugar when preparing desserts.

Taste of the Week: honey and saffron brioche

                                   © Jeff Kauck

I have rarely seen students so enthused and bursting with pride as their airy brioche puffs to grandeur in the oven, arriving shiny and golden to the table just moments later. There is great triumph in baking perfection, and after a class, e-mails, photos, tweets and Facebook notations attest to the students prowess in the kitchen. In my kitchens, I use honey rather than sugar as a sweetener. The reasons are simple: honey just makes food taste better and for us it’s a homegrown product, produced from our bees that call Chanteduc and Provence home. When preparing this brioche, don’t omit the saffron: Infusing it in the warm milk dramatizes the intensity of these golden threads and adds an exotic flavor and aroma to the final product, not to mention the touch of color.

Note that you’ll need to start the brioche several hours before you plan to bake it.


Honey and Saffron Brioche

Makes 2 loaves, about 16 slices each   |   Equipment: A heavy-duty mixer fitted with a flat paddle; a dough scraper;  two nonstick 1-quart (1 l) rectangular bread pans.


Sponge:

1/3 cup (80 ml) whole milk, lukewarm
A generous pinch of best-quality saffron threads (about 1 heaping teaspoon, 30-40 filaments, or 0.3 gram)
1 package (2 1/4 teaspoons; 9 g) active dry yeast
1 tablespoon honey
1 large egg, free-range and organic, lightly beaten
2 cups (280 g) unbleached, all-purpose flour

Dough:

1/3 cup (80 ml) lavender honey, or other mild, fragrant honey
1 teaspoon fine sea salt
4 large, ultra-fresh eggs, free-range and organic, lightly beaten
1 1/2 cups (210 g) unbleached, all purpose-flour
12 tablespoons (6 ounces; 180 g) unsalted butter, at room temperature

Egg wash:

1 large, ultra-fresh egg,  organic and free-range, lightly beaten


1.    Prepare the sponge: In the bowl of the heavy-duty mixer fitted with the paddle, combine the milk, saffron, yeast, and honey and stir to blend. Let stand until foamy, about 5 minutes. Add the egg and 1 cup (140 g) of the flour and and stir to blend. The sponge will be soft and sticky. Sprinkle with the remaining 1 cup (140 g) flour, covering the sponge. Set aside to rest, uncovered, for 30 minutes. The sponge should erupt slightly, cracking the layer of flour.

2.    Prepare the dough: Add the honey, salt, eggs and the 1 1/2 cups (210 g) of the flour to the sponge. With the paddle attached, mix on low speed just until the ingredients come together, about 1 minute. Increase the mixer speed to medium and beat for 5 minutes.

3.    To incorporate the butter into the dough, it should be the same consistency as the dough. To prepare the butter, place it on a flat work surface, and with the dough scraper, smear it bit by bit across the surface. When it is ready, the butter should be smooth, soft, and still cool – not warm, oily, or greasy.

4.    With the mixer on medium-low speed, add the butter a few tablespoons at a time. When all of the butter has been added, increase the mixer speed to medium-high for 1 minute. Then reduce the speed to medium and beat the dough for 5 minutes. The dough will be soft and sticky.

5. First rise: Cover the bowl tightly with plastic wrap. Let the dough rise at room temperature until doubled in bulk, about 2 hours.

6. Chilling and second rise: Punch down the dough. Cover the bowl tightly with plastic wrap and refrigerate the dough overnight, or for at least 4 hours, during which time it will continue to rise and may double in size again.. After the second rise, the dough is ready to use.

7. To bake the brioche: Divide the dough into 12 equal pieces, each weighing about 2 1/2 ounces (75 g).  Roll each piece of dough tightly into a ball and place 6 pieces side by side in each bread pan. Cover the pans with a clean cloth and let the dough rise at room temperature until doubled in bulk, 1 to 1 1/2 hours.

8.  Center a rack in the oven. Preheat the oven to 375°F (190°C).

9.  Lightly brush the dough with the beaten egg. Working quickly, use the tip of a pair of sharp scissors to snip several crosses along the top of each pan of dough. (This will help the brioche rise evenly as it bakes). Place the pans in the oven and bake until the brioche loaves are puffed and deeply golden, 30 to 35 minutes.  Remove the pans from the oven and place on a rack to cool. Turn the loaves out once they have cooled.

The secret: Top-quality honey makes all the difference here. Honey not only enriches the flavor of this brioche, but also helps keep it moist.   

Note: The brioche is best eaten the day it is baked. It can be stored for a day or two, tightly wrapped. To freeze, wrap it tightly and store for up to 1 month. Thaw, still wrapped, at room temperature.  

Note: A reliable saffron source is The Spice House www.thespicehouse.com


This recipe was first published in The French Kitchen Cookbook. Buy the book here.

All rights reserved. Please do not reproduce without permission.

Taste of the week: Jerusalem artichoke soup

How can just three ingredients -- one of them salt -- taste so creamy, rich and delicious? 

Years ago when I was writing about vegetable recipes created by three-star chefs, Pierre Gagnaire demonstrated  this simple,  sublime, wintry Jerusalmen artichoke (also known as sunchoke) soup. Over time, I have turned the thick soup into a sauce for pasta; reduced it a bit for a fine vegetable puree; or thinned out the nutty liquid with stock, using it as a base for poaching oysters or scallops. If truffles are not available when making this soup, try a last-minute drizzle of fragrant hazelnut oil as garnish.   It’s your choice as to peel the artichokes or not. Peeling the gnarled, knobby vegetable is a tedious task, and I rather like the dots of peel that give character to the puree. Just be sure to scrub the vegetable well.   

Jerusalem artichoke soup

8 servings   |   Equipment: A blender or a food processor; 8 warmed, shallow soup bowls. 

2 quarts (2 l) whole milk
2 teaspoons fine sea salt
2 pounds (1 kg) Jerusalem artichokes (sunchokes), scrubbed and trimmed
2 tablespoons minced black fresh black truffles or minced truffle pelings, or 1 tablespoon best-quality hazelnut oil (such as Leblanc brand)  


1.    Rinse a large saucepan with water, leaving a bit of water in the pan. This will prevent the milk from scorching and sticking to the pan.  Pour the milk into the pan and add the sea salt.

2.    Peel the Jerusalem artichokes, chop coarsely and drop immediately into the milk. (This will stop the vegetable from turning brown as it is exposed to the air.) When all the Jerusalem artichokes are in the pan, place over moderate heat and simmer gently until soft, about 35 to 40  minutes. Watch carefully so the milk does not overflow the pan.

3.    Transfer the mixture in small batches to the blender or the food processor. Do not place the plunger in the feed tube of the  food processor or the blender or the heat will create a vacuum and the liquid will splatter. Purée until the mixture is  perfectly smooth and silky, 1 to 2 minutes (note that using a blender rather than a food processor will result in a much smoother texture). 

4.    Return the soup to the saucepan and reheat it gently. Taste for seasoning. Pour it into the warmed soup bowls and shower with the minced truffle, or drizzle with the hazelnut oil. 

A SOUP, A SAUCE, A VEGETABLE SIDE DISH: 
This soup can easily be transformed into a sauce for pasta or to serve as a vegetable side dish. Simple reduce the soup over low heat to desired thickness ,  5 to 10 minutes.


This recipe was first published in Simply Truffles. Buy the book here.

All rights reserved. Please do not reproduce without permission.

Taste of the week: Grilled polenta with tomato and onion sauce

I love this soothing, comforting dish for a quick weeknight meal, especially in winter. And of course the sauce can be dressed up any way you fancy, with whatever you have on hand. Add marinated artichokes, fennel seeds, capers  and olives, scatter fresh buffalo mozzarella over the piping hot sauce just before serving, or add sausage meat and rosemary for a meatlovers version. The possibilities are as endless as your imagination.


Grilled Polenta with Tomato and Onion Sauce

4 Servings   |   Equipment: A 1-quart (1 l) gratin dish, 4 warmed dinner plates.

3 cups (750 ml) 1 % milk
1/2 cup (125 ml) light cream or half-and-half
1 1/2 teaspoons fine sea salt
1/2 teaspoon freshly grated nutmeg
3/4 cup (135 g) instant polenta
1/2 cup (90 g) freshly grated Swiss Gruyère cheese, plus extra for garnish
1 large onion, peeled, halved lengthwise, and cut into thin half-rounds
1/4 cup (60 ml) extra-virgin olive oil
2 fresh or dried bay leaves
One  28-ounce (794g) can peeled Italian plum tomatoes in juice
Fresh, flat-leafed parsley leaves, for garnish


1.    In a large saucepan, bring the milk, cream, 1 teaspoon of the sea salt, and the nutmeg to a boil over medium heat. (Watch carefully, for milk will boil over quickly.) Add the polenta in a steady stream and, stirring constantly with a wooden spoon, cook until the mixture begins to thicken, about 3 minutes.

2.    Remove from the heat. Add half of the cheese, stirring to blend thoroughly.  The polenta should be very creamy and pourable. Pour it into the gratin dish. Even out the top with a spatula. Sprinkle with the remaining cheese. Let sit at room temperature for about 30 minutes to firm up. (Or store, covered and refrigerated, for up to 3 days.)

3.    Prepare the tomato garnish: In a large skillet, combine the onion, 2 tablespoons of the olive oil, and the remaining 1/2 teaspoon of sea salt and sweat – cook, covered over low heat until soft and translucent – about 5 minutes. With a large pair of scissors, cut the tomatoes in the can into small piece. Add the bay leaves and tomatoes and their juices and cook, covered, over low heat for about 15 minutes. Taste for seasoning.

4.    At serving time, heat the remaining 2 tablespoons of oil in a large skillet until hot but not smoking. Cut the polenta into 8 even squares. Sear each square on both sides until golden, about 2 minutes per side. Transfer the squares to the warmed plates, stacking the second slice at an angle over the first. Spoon the sauce all over. Garnish with parsley and cheese.

WINE SUGGESTION: An inexpensive everyday dish suggests an equally fine but gently priced wine. A favorite is Michel and Stephane Ogier’s La Rosine Syrah, a deep purple vin de pays from the hillsides north of the old Roman town of Vienne.

MAKE AHEAD NOTE: Both the tomato sauce and the polenta can be prepared up to 3 days in advance, then covered and refrigerated seperately. Reheat at serving time.

THE SECRET: When using whole, canned tomatoes, use a scissors to cut the tomatoes into small pieces, making for a still chunky yet finer sauce.


This recipe was first published in The French Kitchen Cookbook. Buy the book here.

All rights reserved. Please do not  reproduce without permission.

Taste of the week: Manchego, chorizo and paprika bread

                                               © Jeff Kauck

This anytime of year bread recipe is a quick and easy way to transport yourself to Spain. You can serve this warm out of the oven or at room temperature – I love it sliced and toasted, with more cheese and chorizo on top as an afternoon snack. Or, in the warmer months, it's the perfect picnic bread.


Manchego Chorizo and Paprika Bread

Makes 1 loaf (about 24 thin slices)  |   Equipment: A nonstick 1-quart (1 l) rectangular bread pan.

Oil, for oiling the pan

1 1/4 cups (180 g) unbleached, all-purpose flour

2 teaspoons baking powder

1/2 teaspoon fine sea salt

3 large eggs,  preferably organic and free-range, lightly beaten

1/3 cup (80 ml) extra-virgin olive oil

1/3 cup (80 ml) plain whole-milk yogurt

5 ounces (150 g) Spanish Manchego cheese, cut into 1/4-inch (1/2 cm) cubes

2 ounces (60 g) Spanish chorizo, cut into 1/4-inch (1/2 cm) cubes

1 teaspoon hot Spanish paprika

20 pimento-stuffed green olives

1.     Center a rack in the oven. Preheat the oven to 400°F (200°C). Lightly oil the bread pan.

2.     In a large bowl, combine the flour, baking powder, and salt. Mix to blend. In another bowl whisk together the eggs, oil, and yogurt.  In a third bowl, toss together the cheese, chorizo, paprika, and olives. Add the egg mixture to the flour mixture and stir to blend. Add the cheese mixture and stir to blend.  

3.     Pour the batter into the prepared pan. Smooth out the top with a spatula. Place the pan in the oven and bake until the bread is firm and golden, 25 to 30 minutes. Remove from the oven and place the pan on a rack to cool. Once it has cooled, unmold and serve it at room temperature, in thin slices.


Variations: Omit the cheese and chorizo and replace them with 1 tablespoon toasted ground cumin and 1 tablespoon toasted whole cumin seeds; or, for Curry Bread, omit the cheese and chorizo and replace with 1 tablespoon curry powder.


 This recipe was first published in The French Kitchen Cookbook. All rights reserved. Please do not reproduce without permission.

Taste of the week: Red Boat Fish Sauce

I consider Red Boat Fish Sauce a favorite ingredient and one of my kitchen pantry essentials. Nuoc mam nhi (meaning salted fish water) is a staple of south-east Asian cooking, but I find endless ways of using this umami-rich sauce to deepen the flavors of many of my recipes, both Asian and non-Asian.

This brand in particular is my favorite because, unlike many other store-bought varieties that use additives and sugar, Red Boat fish sauce uses just two ingredients: wild caught black achovies and sea salt. The anchovies are the freshest possible, fished from the clear waters off Phu Quoc island in Vietnam. Using artisanal techniques, the fish is slowly fermented with sea salt for a year in tropical wooden barrels. They bottle only the first pressing, so what you get is a deeply rich, amber liquid, with no additives or preservatives.

Of course fish sauce is a requisite ingredient in Vietnamese dipping sauce, that perfectly balanced accompaniment to so many classic Vietnamese dishes. While the composite components are almost always the same, it is the balance of quantities and quality of ingredients that makes for the perfect dipping sauce recipe. Make sure you use fresh, moist garlic, with the green germ removed, to avoid any bitterness, and a good quality dipping sauce like Red Boat.

I've tested many different variations, and this recipe I think has the best balance of flavors:


Vietnamese Dipping Sauce

Equipment: A mini food processor or a standard food processor fitted with a small bowl; a small jar with a lid.

2 plump, moist garlic cloves, peeled, halved, green germ removed
1 fresh or dried red bird’s eye chile
3 tablespoons Vietnamese fish sauce, preferably Red Boat brand
3 tablespoons freshly squeezed lime or lemon juice
2 tablespoons sugar
1/2 cup (125 ml) water

In the food processor mince the garlic and chile. Add the fish sauce, citrus juice, sugar, and the water. Pulse to blend. Taste for seasoning. Transfer to the jar and tighten the lid. (Store in the refrigerator for up to 1 week.)

Makes 3/4 cup (185 ml)

Buy Red Boat Fish Sauce here from My Amazon Store.


This recipe was first published in The French Kitchen Cookbook. All rights reserved. Do not reproduce without permission.

Taste of the Week: Warm Oysters wih Truffle Cream and Truffles

©Jeff Kauck

It's my annual Black Truffle Cooking Class this week, and we are knee-deep in fresh truffles here in Provence, the homeland of the 'black diamond'.  So I couldn't help but share this simple but wonderful truffle recipe of mine that combines two of my most favorite French ingredients: oysters, and of course black truffles. The sauce here is amazing and versatile. How could the combination of oyster liquor, cream, butter, and truffle juice be bad? The silken texture of the warmed oyster creates a fine contrast to the crunch of the truffle matchsticks. An all round winner!


Warm Oysters wih Truffle Cream and Truffles

4 servings   |   Equipment: A fine-mesh sieve; a flat ovenproof serving dish; a small jar with a lid; a mandoline or a very sharp knife.

12 large fresh oysters
1 cup (280 g) coarse sea salt
1 fresh black truffle (about 1 ounce; 30 g), cleaned
1/4 cup (60 ml) Truffle Cream (see recipe below)
About 1 tablespoon truffle juice
2 teaspoons (10 g) butter (truffled, if you have it on hand)
1/2 teaspoon freshly squeezed lemon juice, or to taste

How to make truffle cream:

It was chef Joël Robuchon who drilled into my head the phrase “fat fixes flavor.” When I began working with truffles, I searched for every way possible to capture their elusive flavor and aroma. A rich, heavy cream does the trick. I use it liberally during truffle season.

Makes 2 cups (500 ml)

Equipment: A jar, with a lid.

5 tablespoons (1 ounce; 30 g) minced fresh black truffle peelings
2 cups (500 ml) heavy cream

1.    In a jar, combine the truffles and cream. Cover securely and shake to blend. Refrigerate at least 2 days before using. (The mixture will stay fresh, stored in an airtight container in the refrigerator, for 1 week.)


Note: My favorite truffle supplier in Provence, Plantin in the village of Puymeras, supplies the top chefs in the world with fresh truffles from November to March, and with preserved truffle products year-round. Products can be purchased from their web site.

1.    Open the oysters, cut the muscle to extract it from the shell, and filter the oyster liquor through the sieve set over a small saucepan.

2.    Cover the bottom of the ovenproof serving dish (it should be large enough to hold the oysters in a single layer) with a thin layer of the coarse salt. Place the opened oysters in their shells on the bed of salt to keep them stable. Refrigerate. Within about 15 minutes, the oysters will give off a second, even more flavorful oyster liquor.

3.    Meanwhile, arrange a rack in the oven about 5 inches (12.5 cm) from the heat source. Preheat the broiler.

4.    With a vegetable peeler, peel the truffle. Mince the truffle peelings, place in the small jar, and tighten the lid. Reserve the peelings for another use (to make truffle salt or truffle butter for example). With the mandoline or very sharp knife, cut the truffle into thick slices. Cut the slices into matchsticks.

5.    In the saucepan containing the reserved oyster liquor, add the cream and truffle juice and bring to a simmer over low heat. Whisk the butter and the lemon juice into the sauce, whisking vigorously to give it volume. If the sauce appears too thick, thin it with additional truffle juice. Add half the truffle matchsticks and just warm them gently. Do not cook them.

6.    Spoon the sauce over the oysters. Place the baking dish under the broiler and cook just until the oysters are warmed through, no more than 20 to 25 seconds. The sea-fresh aroma of oysters should begin filling the air as they warm up.

7.    Cover 4 plates with the coarse sea salt to keep the oysters stable. Arrange 3 of the oysters on each plate. Garnish with the remaining truffle matchsticks. Serve.


Wine suggestion: With oysters, I always reach for a Picpoul de Pinet, a white that grows near the Mediterranean oyster beds. It is made with 100 percent Picpoul grape, and has a distinct acidity and a pleasing, spicy finish. Another great choice is always a Sauvignon Blanc, either a Sancerre or Quincy.


These recipes were originally published in Simply Truffles. All rights reserved. Do not reproduce without permission.

Taste of the week: Kumquat conserve

©Jeff Kauck

My faithful little kumquat tree in Provence produces a year-round supply of these beautiful golden nuggets, giving me ample opportunity to make this tangy jam-like conserve that pairs wonderfully with fresh goat's milk cheese. It's always nice to have a supply in the pantry to take as a host gift when going to a dinner party, or to give to friends who come to stay.


Kumquat Conserve

Makes 1 quart (1 l)   |     Equipment: Eight 1/2-cup (125 ml) canning jars with lids.

1 1/2 pounds (750 g) unblemished fresh kumquats
2 cups (500 ml) fresh blood orange, mandarin orange, or regular orange juice
1 cup (200 g) unrefined cane sugar, preferably organic, vanilla scented (see Note)

  1. Stem the kumquats, halve them lengthwise, and remove and discard the seeds.
  2. In a large saucepan, combine the kumquats, orange juice, and sugar. Bring to a simmer and simmer, skimming the surface as needed, until the juice is thick and the kumquats are soft and translucent, about 1 hour. Skim off and discard any recalcitrant seeds that float to the surface. Let cool.
  3. Transfer to the canning jars and secure the lids. (Store in the refrigerator for up to 2 weeks.)


Note: To make vanilla-scented sugar: Flatten 1 or several moist vanilla beans. Cut them in half lengthwise. With a small spoon, scrape out the seeds and place them in a small jar; reserve the seeds for another use. Fully dry the vanilla bean halves at room temperature. Place the dry halves in a large jar with a lid, and cover them with sugar. Tighten the lid and store for several weeks to scent and flavor the sugar. Use in place of regular sugar when preparing desserts.

This recipe was first published in The French Kitchen Cookbook.

All rights reserved. Do not reproduce without permission.