Nourish the Planet: Gluten-free batter bread

 
Gluten free bread slices-2.jpg
 

Any cook looking for a golden, cake-like gluten-free bread recipe need look no further. This healthy wholegrain bread requires no special equipment and couldn’t be simpler to throw together. Each ingredient plays a role here: The brown rice flour is full of fiber and helps provide the bread with a grainy texture and a fine, dry crumb. The cornstarch helps create a tender, dessert-like texture and can also be swapped out for nutrient-dense arrowroot which is known to be good for the gut. The psyllium (also a very gut-friendly ingredient) helps bind the bread and retain moisture, keeping it from becoming too crumbly. Finally, the baking powder increases the volume and lightens the texture of this new star of our kitchen.

Gluten-free batter bread

Makes 2 loaves   |   Equipment:  Two 1-quart (1 l) nonstick rectangular loaf pans; a baking sheet; a cooling rack

Ingredients

Butter or extra virgin olive oil, for greasing the pans
1 ½ cups (375 ml) lukewarm water, divided
2 tablespoons active dry yeast
2 tablespoons honey
2 tablespoons (30 g) melted butter or extra virgin olive oil plus more for garnish
3 organic, free-range egg whites, at room temperature
1 teaspoon apple cider vinegar
2 cups (260 g) organic, gluten-free brown rice flour
1 cup (70 g) organic, gluten-free cornstarch
2 tablespoons psyllium husk powder
1 1/2 teaspoons fine sea salt
2 teaspoons gluten-free baking powder

Method

1.  Center a rack in the oven. Preheat the oven to 400°F (200°C). Butter the bottoms and sides of the pans.

2.  In a measuring cup, combine ½ cup (125 ml) lukewarm water, the yeast and honey. Stir and set aside until the mixture bubbles and has a fragrant yeast aroma, about 10 minutes.

3.  In a small bowl, combine the 2 tablespoons (30 g) melted butter, the egg whites, and vinegar and stir to blend.

4.  In a large bowl, combine the rice flour, cornstarch, psyllium, salt, and baking powder, and stir to blend. Add the yeast mixture and stir to blend. Add the remaining 1 cup (125 ml) of lukewarm water and the butter mixture and stir to blend. The mixture should be thin, like a cake batter.

5. Pour the batter into the pans, evenly dividing the batter. Place the pans on the baking sheet, cover with a cloth, and let rise until doubled, about 20 minutes. Place the baking sheet in the oven and bake for 20 minutes. Remove the baking sheet from the oven, turn the breads out onto the sheet, turn upright, and return the baking sheet to the oven. Bake until the breads are deep golden and firm, about 20 minutes more. Transfer the breads to a cooling rack and brush with butter or olive oil. Wait until the bread is completely cooled to slice. The bread is best when toasted. Store in a cloth bag for up to three days.


This is a Nourish the Planet recipe, part of a collaborative series by Patricia Wells and Emily Buchanan.
© 2021 – All rights reserved. Please do not reproduce without permission.

Find our more here about why we created this series.

Nourish the Planet: Orange, Almond and Rhubarb Cake

 
Orange+Almond+and+Rhubarb+Cake.jpg
 

The orange and almond base of this cake could happily exist all on its own, with its deep caramel flavors and moist crumb. But the layer of bright sour rhubarb and lick of coconut sugar to finish really makes you sit up and notice. Simple to throw together and moist enough to stay fresh for up to 3 days (if it lasts that long), this recipe is sure to become a family classic. What’s more, it’s packed full of healthful whole food ingredients – oat and coconut flour that are high in fibre (good for gut health and stabilizing blood sugar), healthy fats from the olive oil and almonds, and just a modest amount of unrefined sugars. An all-round winner!

Nourish notes: Coconut flour is a biproduct of making coconut milk, where the residual coconut flesh is dehydrated and then ground into flour. So why seek out alternative flours like oat and coconut when white flour is so cheap, easy to find and so commonly used in cake recipes? We don’t always consider the lifecycle of common food products like flour, but on closer inspection it turns out that the production, processing and transportation of refined wheat flour grown as a monoculture has a rather hefty carbon footprint. This is made worse by the heavy use of pesticides and herbicides needed to perpetuate monocrop culture which has been linked to the steep decline in biodiversity we are currently seeing. By diversifying our pantries to include alternative grains and flours means that we are supporting a more diverse food system that embraces all the varieties of plants and grains available to us.

Orange, Almond and Rhubarb Cake

8–12 servings | Equipment : An electric mixer fitted with a paddle or a hand-held mixer, an 8-inch (20-cm) nonstick springform cake tin, baking parchment

Ingredients

1/3 cup (80 ml) extra virgin olive oil
1/4 cup (60 ml) maple syrup
2 eggs, free range and organic
Zest and juice of 1 organic orange, topped up with coconut milk or plant-based milk to make. 1/3 cup (80 ml)
1 cup (90 g) oat flour
1/3 cup (30 g) coconut flour
1/4 cup coconut sugar, plus 1 tablespoon (for the topping)
1/3 cup (30 g) ground almonds
1 teaspoon baking soda
1/2 teaspoon salt
1 cup (150 g) rhubarb, cut crossways into thin slices

Method

 1.    Preheat the oven to 180°C. Line the spring form tin with baking parchment or rub the inside of the tin with olive oil.

2.     In the bowl of the stand mixer, beat the olive oil, maple syrup  and eggs on high until light and fluffy. Add the orange juice, zest and milk and beat again until well incorporated.

3.    In a separate bowl combine the dry ingredients: oat flour, coconut flour, ¼ cup coconut sugar, ground almonds, baking soda and salt. Stir to combine and then add the dry ingredients to the wet mixture and gently fold in until well combined.

4. Pour the mixture into the prepared cake tin. Place the rhubarb slices in a spiral covering the top of the mixture and sprinkle with the remaining tablespoon of coconut sugar. Bake for 45 minutes, or until a test skewer comes out clean. Allow to cool in the pan for at least 10 minutes, then remove the springform pan and place on a rack to cool.


This is a Nourish the Planet recipe, part of a collaborative series by Patricia Wells and Emily Buchanan.
© 2021 – All rights reserved. Please do not reproduce without permission.

Find our more here about why we created this series.

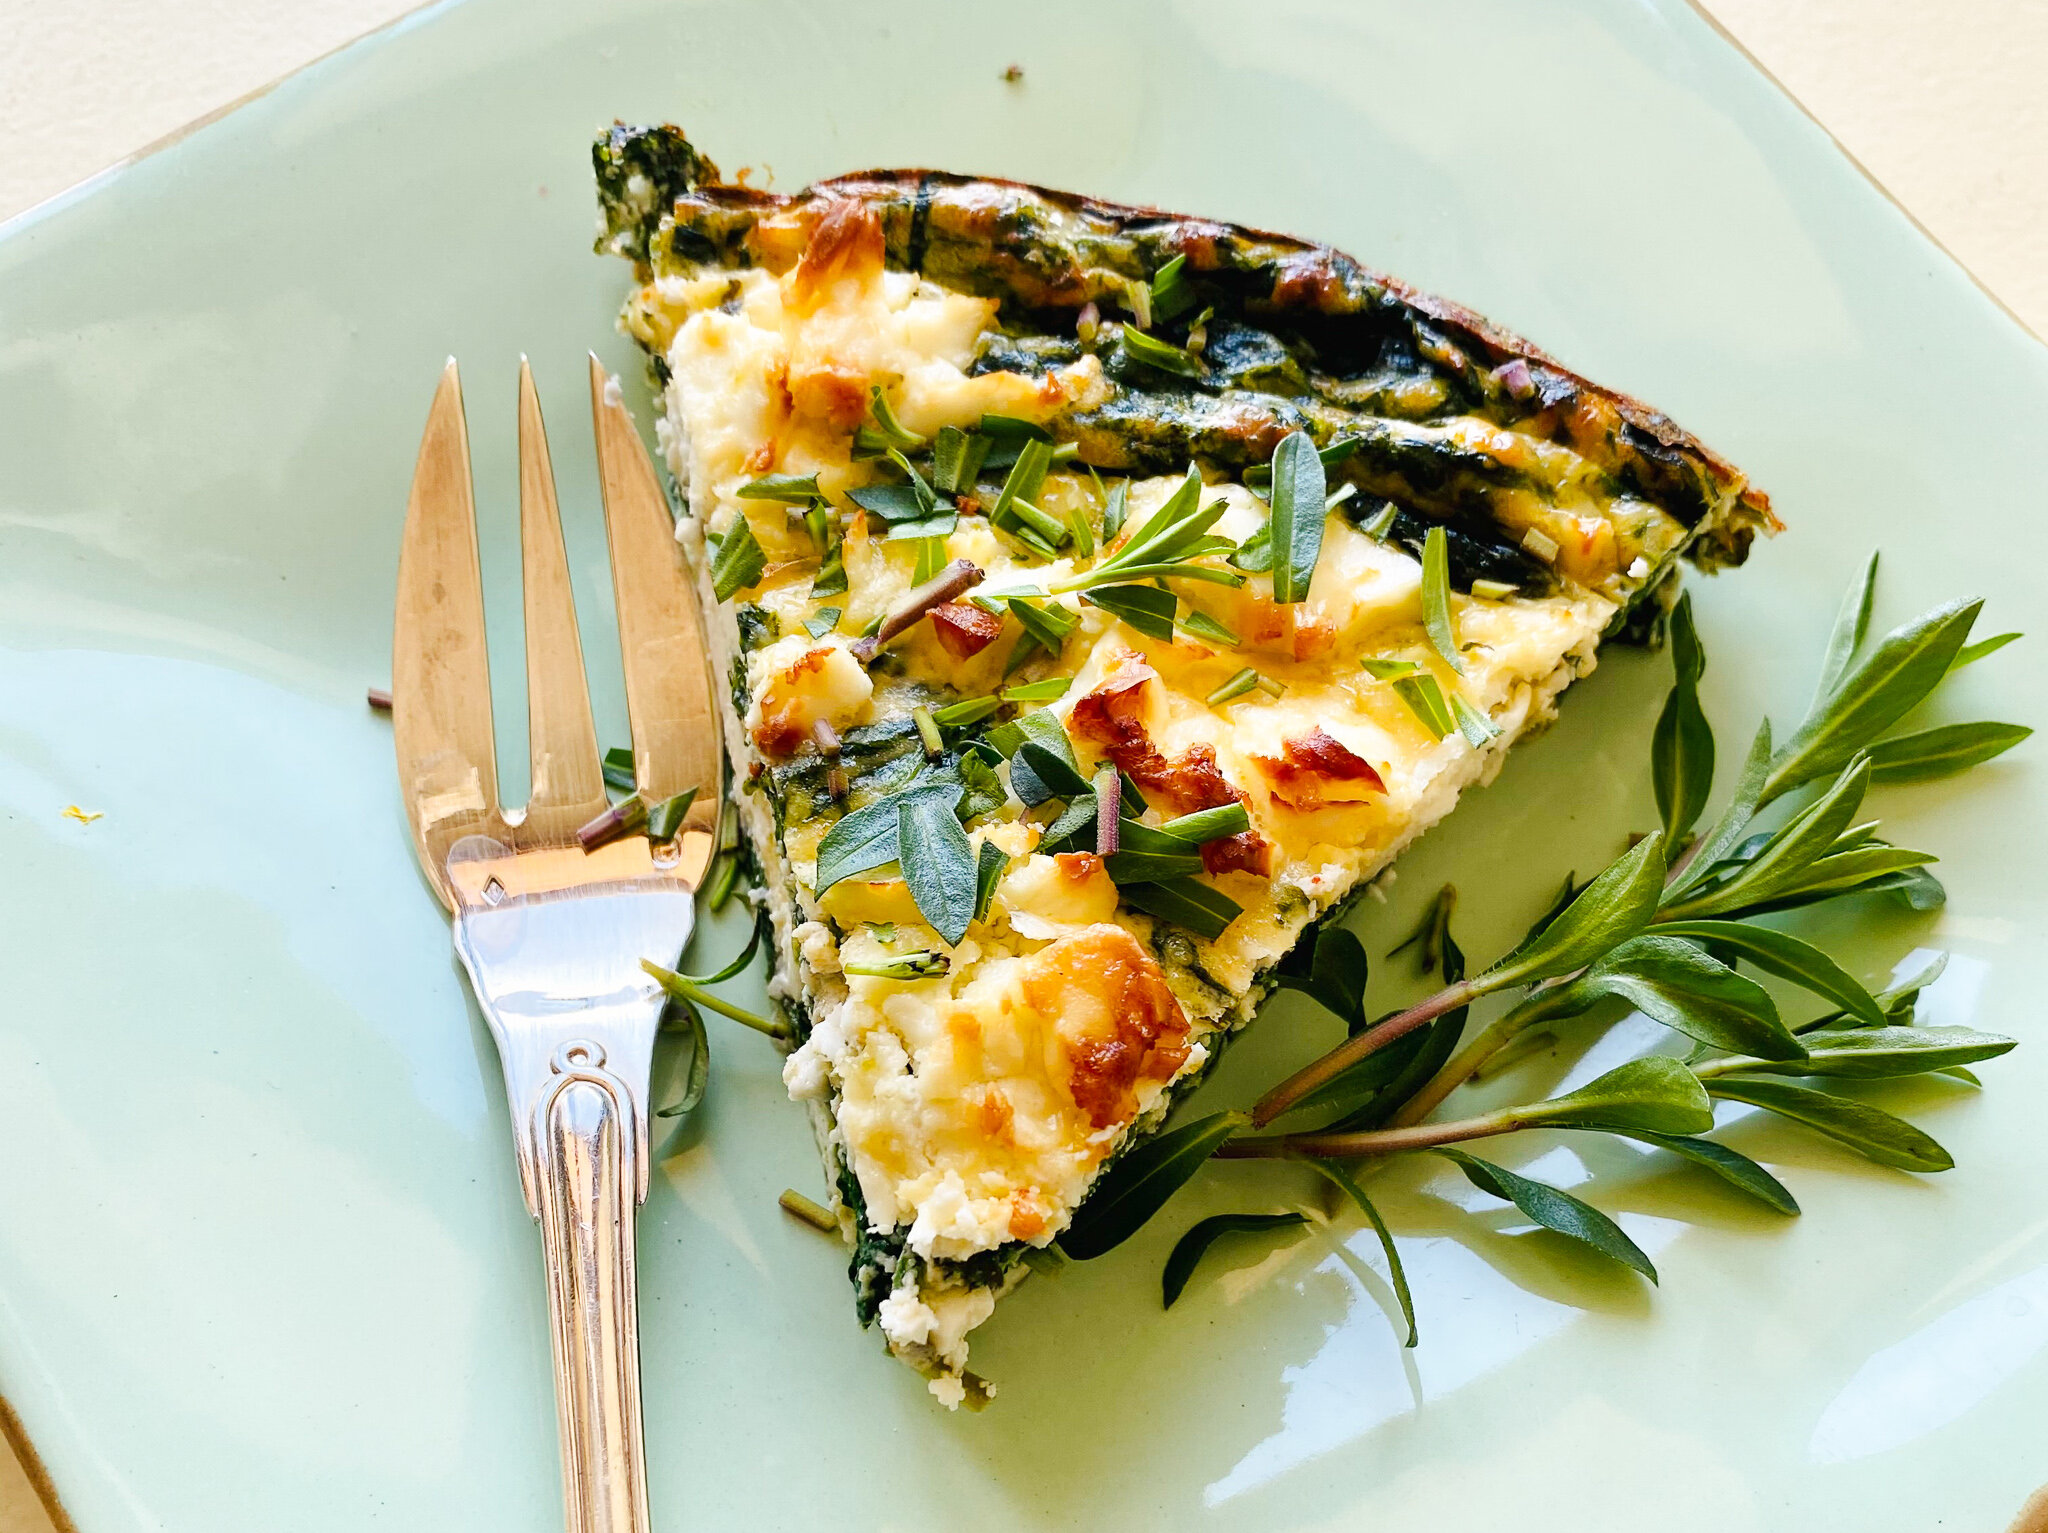
Nourish the Planet: Spinach, Ricotta and Feta Frittata


We hear a lot about reducing the amount of meat in our diet for environmental reasons, but what about cheese? Living in a country with over a thousand different kinds of cheese, it’s a subject that’s hard to ignore. Cheese produced from cow, sheep and goat’s milk can have relatively high emissions tags, but not all cheeses are created equal, since different types of cheese require more milk, longer aging periods etc. Here are some tips to follow for environmentally minded cheese lovers who are not quite ready to switch to vegan alternatives:

Support small-scale sustainable farms (organic if possible) either by buying direct from them or from the cheesemongers that support them, rather than from large industrial operations (i.e avoid supermarket cheese). They are more likely to have fewer environmental impacts and promote soil health and biodiversity through their land management systems.

Opt for fresh cheeses over aged ones, such as ricotta, feta or fresh mozzarella, because less processing equals less impact on the planet.

The jury still seems to be out on the exact methane emissions from cows, goats and sheep, however sheep’s milk contains double the amount of solids as other milk, meaning it requires half as much milk to produce the same quantity of cheese.

This simple spring frittata pairs fresh sheep’s milk ricotta and feta with the classic partner of spinach, but you could use any nutrient-rich greens, such as a mix of arugula, New Zealand spinach (tetragone), Swiss chard, or sorrel. Serve it alongside salad greens or pack it up for an effortless but impressive spring picnic lunch.

Spinach, Ricotta and Feta Frittata

Makes one frittata, serving 8 | Equipment: A 10-quart (10 l) pasta pot fitted with a colander; a 9-inch (23 cm) spring-form pan, seasoned with oil

Ingredients

3 tablespoons coarse sea salt
1 pound (500 g) fresh spinach, washed
3 organic, free-range eggs
8 ounces (250 g) organic sheep’s milk ricotta cheese
4 ounces (125 g) organic sheep’s milk feta cheese, crumbled
¼ teaspoon fine sea salt
½ teaspoon freshly grated nutmeg
Fresh herbs for garnish: minced summer savory, chives, basil, dill, or thyme

Method

1. Center a rack in the oven. the oven. Preheat the oven to 350°F (175°C).

2. Fill the pasta pot with 8 quarts (8 l) of water and bring to a boil over high heat. Once boiling, add the coarse sea salt and the spinach and cook just until the spinach is wilted, about 2 minutes. Drain and, with the spinach still in the colander, refresh it with cold running water. This will help the spinach maintain its bright green color. Transfer it to a large, clean kitchen towel and fold the towel over the spinach, wringing it out to remove as much liquid as possible from the spinach.

3. In a bowl, whisk the eggs. Add the ricotta and, with a fork, mix to blend. Add half of the feta, the salt, and nutmeg and mix to blend. Coarsely chop the spinach and add it to the bowl. Mix to blend.

4. Transfer the mixture to the prepared pan. Shower with the remaining feta cheese. Place in the oven and bake until firm and golden, about 30 minutes. Remove from the oven to cool before unmolding. Serve warm or at room temperature, showered with fresh herbs.


This is a Nourish the Planet recipe, part of a collaborative series by Patricia Wells and Emily Buchanan.
© 2021 – All rights reserved. Please do not reproduce without permission.

Find our more here about why we created this series.

Nourish the Planet: Socca

 
Socca.jpg
 

These golden brown chickpea flour crêpes – known as socca in Nice and farinata in Liguria – are served deliciously warm from the oven, seasoned generously with coarsely ground black pepper, then torn into raggedy shards and eaten out of hand.

This is a simple, gluten free preparation – made from just 4 ingredients – but can be frustrating to get “just right.” The batter (which should contain oil, but the end result shouldn’t be oily) can be made several hours ahead, with the socca baked at the very last moment. Once baked, it should be just thick enough to fold into torn portions, not break up into dry handkerchiefs. This beauty was baked in a tin-lined copper socca pan, much like a flat paella pan, but any large, round, flat oven-proof pan, such as a cast iron skillet would do just fine.

Nourish notes: Chickpeas have some of the lowest carbon emissions of any plant foods, and ground into flour make a healthy, creative alternative to wheat flour. There are 6,000 plant species available to us for cultivation for food, yet the ubiquity of monocultures in industrial farming mean that only 9 of them make up 66% of total crop production. Filling our pantries with a wide variety of grains, legumes and flours is not only good for our health but is a way to support biodiversity in our food system.

Socca

Chickpea Flour Crêpes

8 servings   |    Equipment: a  2-cup (500 ml) measuring cup, with a pouring spout; a 12- inch (30 cm) round ovenproof socca pan, paella pan, or cast-iron skillet; a pastry brush

Ingredients

1 cup (100 g) chickpea (garbanzo) flour
1 cup (250ml) water
1 teaspoon fine sea salt
4 tablespoons fruity, extra-virgin olive oil, divided
Coarse, freshly ground black pepper (Timut by preference)

Method

1.     In the measuring cup, whisk together the flour, water, salt, and 2 tablespoons of oil. The batter should be thin and crepe-like. It will be a bit lumpy. (The batter can be prepared up to 24 hours in advance, stored and covered at room temperature.)

2.     About 25 minutes before baking the socca, place a rack in the bottom shelf of the oven. Place the empty pan or skillet on the shelf. Preheat the oven to maximum, ideally at least 450°F (230°C) to 500°F (260°C).

 3.     To bake the the socca, carefully remove the hot pan or skillet from the oven. Pour the remaining 2 tablespoons of oil into the pan and brush to evenly distribute the oil. Pour the batter into the pan, swirling to evenly distribute the batter. Return the pan to the oven and bake until the socca is bubbly, colored a deep golden brown and evenly dotted with little crater-like holes, 12 to 15 minutes. Remove from the oven, and season generously with the pepper. Use a scraper to scrape the socca into raggedy shards.  Serve warm.


This is a Nourish the Planet recipe, part of a collaborative series by Patricia Wells and Emily Buchanan.
© 2021 – All rights reserved. Please do not reproduce without permission.

Find our more here about why we created this series.

Nourish the Planet: Berry, Rose and Lemon "Cheesecake"

 
Berry Rose and Lemon Cheesecake.jpg
 

It’s no secret anymore that our food system is contributing to climate change, more than a quarter of all greenhouse gas emissions in fact. An article earlier this month in the Atlantic “Your Diet is Cooking the Planet. But two simple changes can help”, names eating less meat and dairy and reducing food waste as by far the most impactful ways that individuals can make a difference.

One of the hardest things about changing the way you eat, for environmental or other reasons, is that sense you’ll have to give up the foods you love. Cheesecake is a perfect example. How could you possibly reproduce the luxurious creaminess of this iconic dessert (that dates back to ancient Greece) without using some sort of cheese? (The giveaway is in the name after all!) The answer, happily is quite easily, and with fantastically satisfying results. This recipe was inspired by a dairy-free cheesecake created by chef and cookbook author Emma Galloway of My Darling Lemon-Thyme, who uses coconut oil to set a cashew cream base. Our version combines of cashews, almonds and coconut milk as the base for the cream filling, set on a light oat and almond crust. Lemon juice serves as a bright replacement for the lactic tang of cream cheese, with the zest giving an extra hit of citrus fragrance.

A few notes on ingredients and process:  

  • Ground almonds (almond flour) can be used instead of whole soaked almonds, if that’s what you have on hand or if time is limited.

  • When sourcing coconut products, make sure to look out for a brand that uses sustainably farmed coconuts, that are not grown on deforested land.

  • When blending the filling, for a smoother consistency, we recommend using a blender rather than a food processor.

Berry, Rose and Lemon "Cheesecake"

Serves 8 | Equipment : A food processor, an 8-inch (20 cm) springform baking pan, lined with parchment paper; a blender

Ingredients

Base
3/4 cup (105 g) whole or ground almonds
1 cup (100 g) wholegrain (not instant) rolled oats
1/4 cup (30 g) coconut sugar
6 tablespoons (90 ml) extra virgin olive oil
1/8 teaspoon sea salt

Filling
1 cup (145 g) raw whole almonds (soaked overnight, see notes below)
1 3/4 cup (250g) raw cashews (soaked for at least 4 hours, overnight if possible, see notes below)
1/2 cup (125 ml) coconut milk
Zest and juice of 2 large organic lemons (about ½ cup; 125 ml)
10 tablespoons (150 ml) maple syrup
200 ml expeller-pressed coconut oil (melted)
1/8 teaspoon sea salt

Topping
2 cups mixed berries, fresh or frozen
1/4 cup freshly squeezed orange juice (about the juice of 1 orange)
2 teaspoons arrowroot powder
1/4 teaspoon rose water

Method

1. Centre a rack in the oven. Preheat the oven to 350°F (180°C).

2. Place the almonds in the bowl of the food processor and process until they look like fine breadcrumbs. Add the oats, coconut sugar and salt and process again until well combined and the crumb is even in size. Add the extra virgin olive oil and process again until the mixture begins to come together. Turn the mixture out into the prepared baking tin, pressing down on the mixture with the back of a spoon to create a tightly packed, even base. Bake in the oven until beginning to turn golden, about 15-20 minutes. Set aside to cool.

3. While the base is cooking, prepare the filling. Drain and rinse the nuts. Pop the almonds out of their skins and rinse again (or place directly in the blender if using ground almonds). Place the nuts into the blender with the remaining filling ingredients and process until smooth and creamy, about 1 minute (depending on the power of your blender motor).

4. Pour the filling onto the cooled base, evening out the surface with a spatula. Tap the baking pan several times on the countertop to remove any air bubbles, and place in the refrigerator to set for at least 6 hours, preferably overnight.

5. To make the topping, place the berries and orange juice in a small pan over low heat and simmer gently until warmed though. In a small bowl, mix the arrowroot with 1 tablespoon water and stir to blend. Add the arrowroot to the berry mixture and swirl the pan in a circular motion or stir gently to incorporate, being careful to keep the berries intact. Allow to simmer until the sauce begins to thicken. Remove from the heat and add the rose water. Stir carefully to combine. Set aside to cool.

6. To assemble, remove the set cheesecake from the springform pan, carefully removing the parchment paper also. Place on a large plate or serving platter. Top with the berry sauce, allowing the liquid to dribble down the side of the cheesecake for dramatic effect. Serve immediately.

Additional notes

Soaking the nuts overnight will soften them up so they can be blended into a smooth consistency. Soak in a generous amount of water, covered by at least a couple of inches above the nuts, with a teaspoon of salt. Soaking and adding salt will help to break down the hard to digest enzymes in nuts, making them more digestible and the nutrients more bio available. If you don’t have time to soak the nuts, simmer them in water for 30 minutes.

 Arrowroot is a tuber native to tropical climates, high in fiber and nutrients, that is most often dried and processed into a fine powder. It behaves much like cornstarch or corn flour but has a much more interesting nutritional profile, is known to have anti-inflammatory properties and be beneficial to gut health. If you can’t find arrowroot, corn flour will do as a substitute.


This is a Nourish the Planet recipe, part of a collaborative series by Patricia Wells and Emily Buchanan.
© 2021 – All rights reserved. Please do not reproduce without permission.

Find our more here about why we created this series.
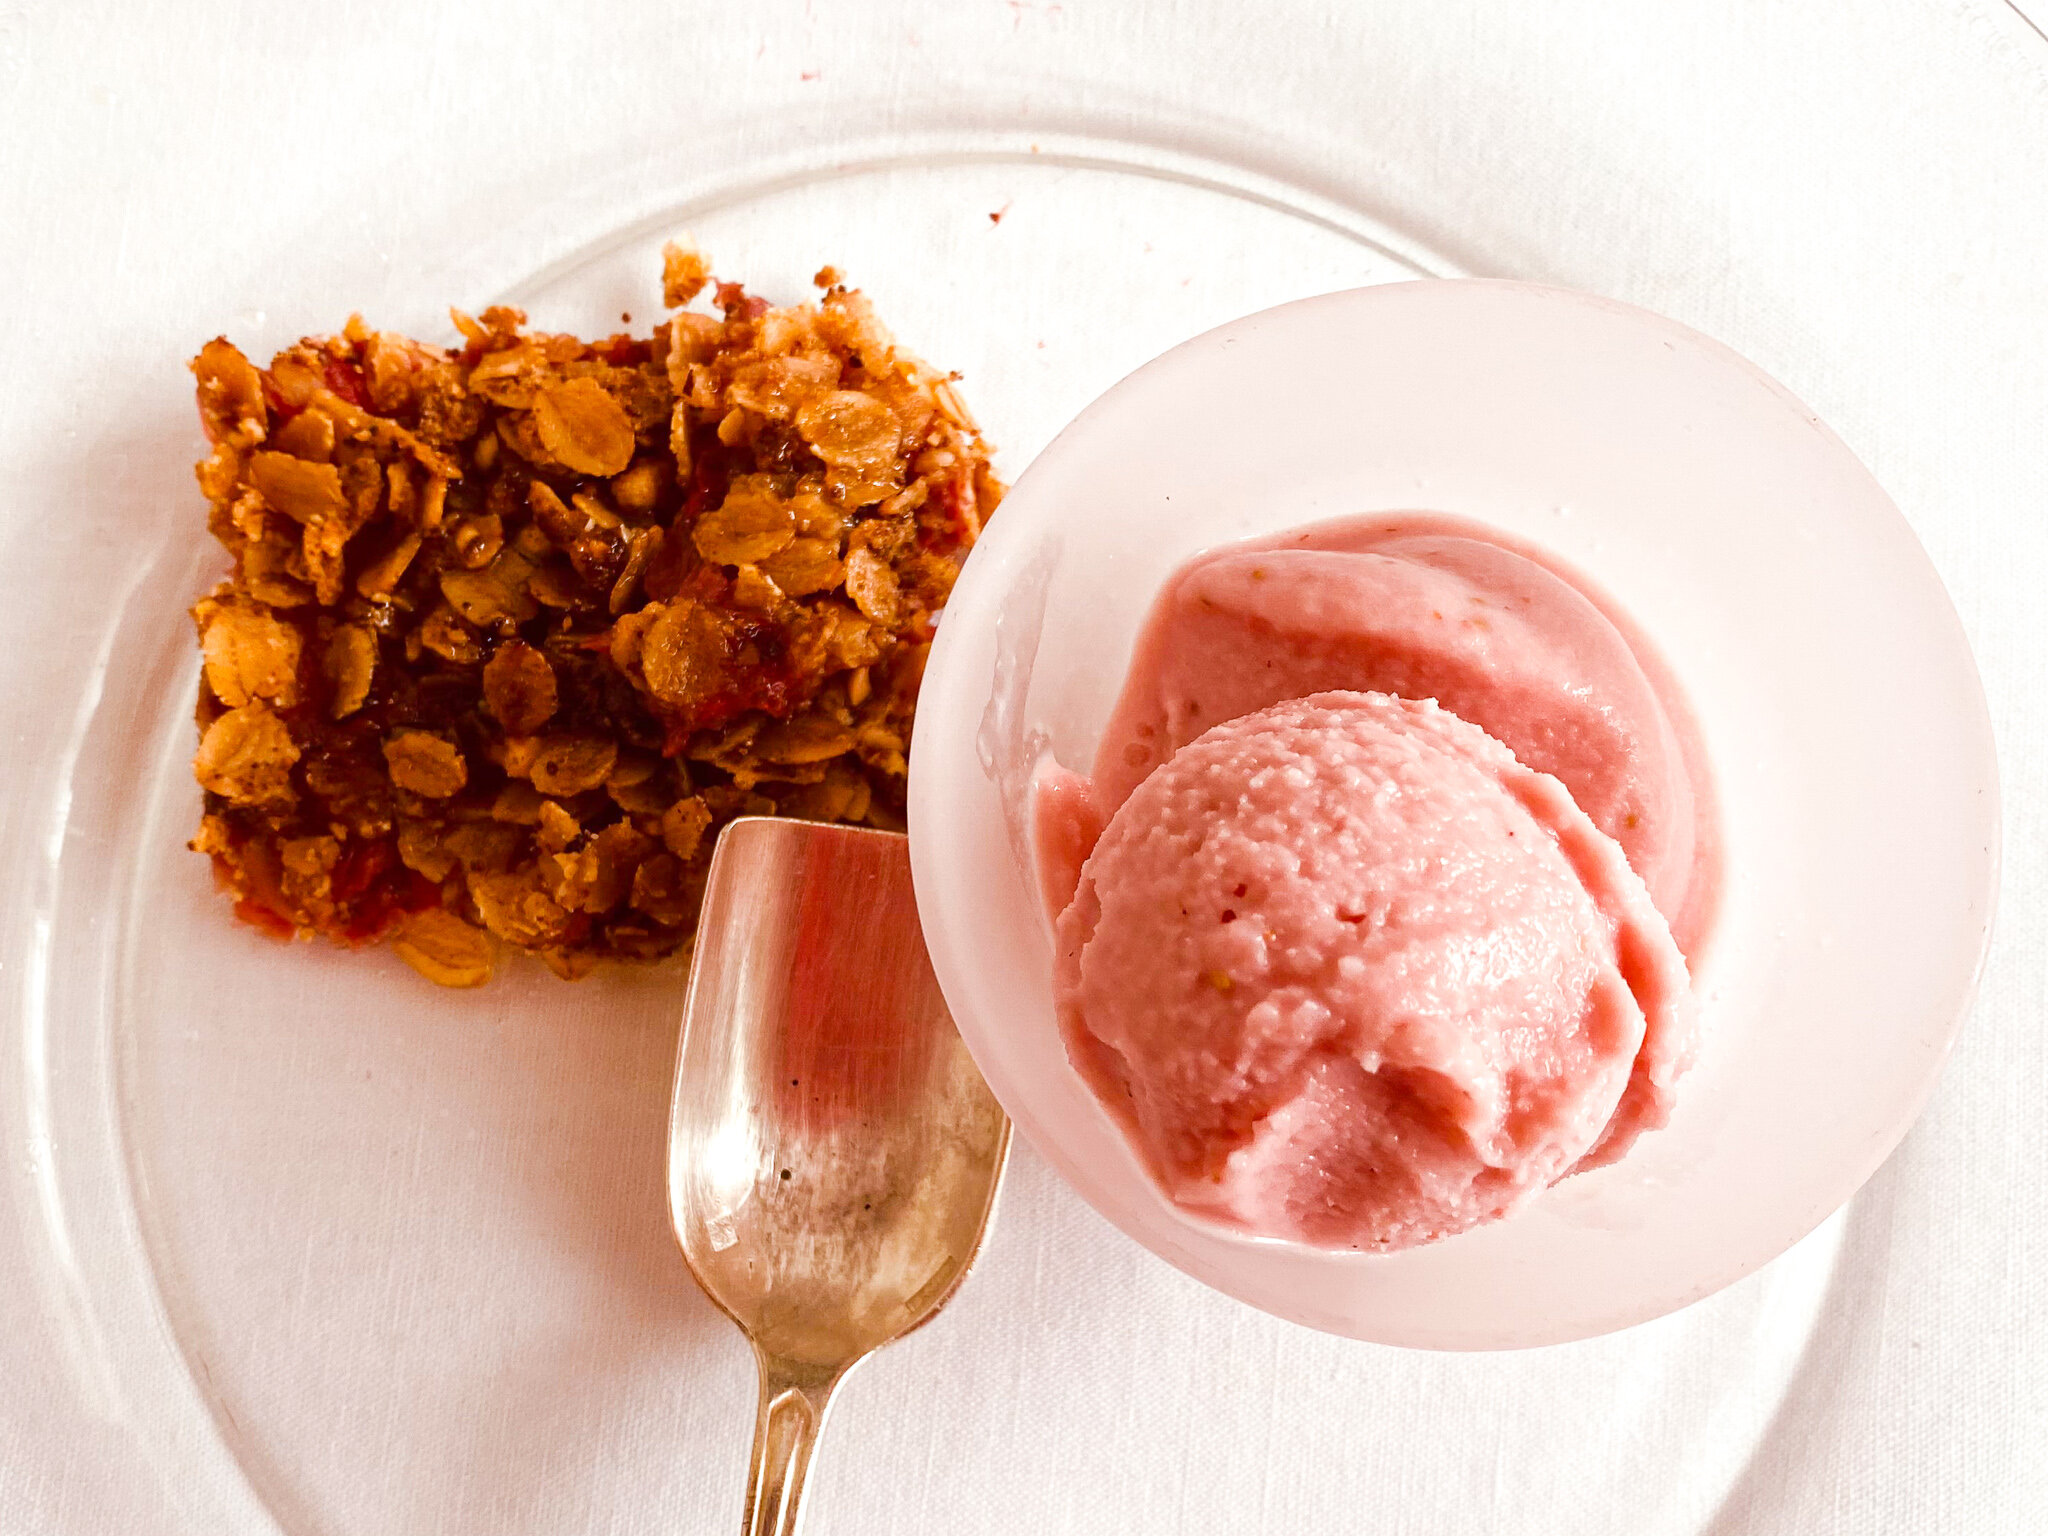
Nourish the Planet: Strawberry Yogurt Sorbet and Strawberry Crisp

 
strawberry sorbet and crisp.jpg
 

After many long months of pears and apples, the sight of fresh local strawberries in the markets is cause for celebration. Eaten fresh straight out of the punnet (or even better, picked ripe from the plant if you grow your own!) is proof of nature’s perfection. But if you have a glut of strawberries (lucky you!) or want to create a more elaborate dessert, this strawberry yogurt sorbet paired with strawberry crisp (or crumble) is super light, easy to make, and doesn’t’ loose the bright fragrant flavor of fresh strawberries. The sorbet recipe plays up the strawberry’s best qualities, with its bright pink color, and intense fruity flavor and aroma. Use the best-quality full-fat sheep’s milk yogurt you can find, or a thick, creamy plant-based alternative, and a good vanilla-scented organic cane sugar. (Click the link in my profile for the recipe.)

There are more than 600 varieties of these tiny, healthy, heart-shaped fruits, bursting with life-giving properties: they are known to increase HDL (good) cholesterol, lower blood pressure, guard against cancer, and are packed with vitamins, fiber, and high levels of antioxidants. A single serving – about 8 berries – provides more Vitamin C than an orange! But beyond those positive health notes, embrace their intense fragrance and equally powerful, full-fruit flavors.

Not all strawberries are created equal however. In France, the queen of strawberries is the Gariguette, brilliant shiny red, firm, juicy and highly perfumed. Strawberries were first cultivated in ancient Rome, and in provincial France they were regarded as an aphrodisiac. In the U.S., the best berries for flavor include Earliglow (considered the best-flavored of widely grown commercial varieties) and Fragaria Virginiana, the American wild strawberry. Try and avoid hot house strawberries that are grown out of season that use huge amounts of energy to grow, and are almost always less flavorful.

When buying strawberries, be certain to buy organic too. According to the Environmental Working Group (an American nonprofit group that seeks to help people live healthier lives in a healthier environment), strawberries placed first in their annual listening of the Dirty Dozen, a list that ranks fresh produce according to the amount of pesticides and cancer-causing chemicals residue found on and in the produce. Supporting organic farming where you can also helps to protect biodiversity.

Strawberry Yogurt Sorbet

Makes 1 quart (1 l) | Equipment: A blender; an ice-cream machine; a sieve;  8 chilled ice cream bowls.

Ingredients

1 pound (500 g) organic fresh strawberries, hulled and halved
1/2 cup (100 g) vanilla-scented organic cane sugar
1 tablespoon kirsch (cherry eau-de-vie)
1 teaspoon freshly squeezed organic lemon juice
1/8 teaspoon fine sea salt
1 ½ cups (350 g) organic plain, full-fat sheep’s milk yogurt, or a creamy plant-based alternative

Method

In the blender, combine all the ingredients and puree until smooth. Taste for seasoning and adjust as necessary. Place the sieve over a medium bowl and strain the mixture into the bowl to remove the seeds, using a ladle to push the mixture through the sieve. Discard the seeds. Thoroughly chill the sorbet mixture. At serving time, transfer the mixture to an ice-cream maker and freeze according to the manufacturer’s instructions. For best results, serve the sorbet as soon as it is frozen. Do not re-freeze.

Strawberry Crisp

Makes 16 squares | Equipment: A 10-inch (25 cm) square baking pan

Ingredients

Olive oil spray
1 pound (500 g) organic fresh strawberries, hulled and coarsely chopped
2 tablespoons cornstarch
1 teaspoon almond extract

¾ cup (60 g) organic oats
¼ cup whole wheat or spelt flour
2 tablespoons finely chopped hazelnuts
1/8 teaspoon fine sea salt
2 tablespoon coconut sugar
3 tablespoons extra-virgin olive oil

Method

1. Center a rack in the oven. Preheat the oven to 350 degrees F (175 degrees C.) Spray the baking pan with oil.

2. In a large bowl, toss together the strawberries, cornstarch, and almond extract. Stir to combine, stirring until no white patches of cornstarch are present. Transfer the mixture to the baking pan and even out with the back of a spatula.

3. In a small bowl, stir together the oats, flour, hazelnuts, salt, and sugar. Stir to combine. Add the oil and stir until the mixture forms a crumbly mix. With your fingers, drop the crumble on top of the strawberries in the baking pan, working to even cover the fruit.

4. Place the baking pan in the oven at bake until golden brown, 50 to 60 minutes. Allow the crisp to cool before cutting into squares to serve. Store in the refrigerator or at room temperature for several days. Serve with a bowl of Strawberry Yogurt Sorbet alongside.


This is a Nourish the Planet recipe, part of a collaborative series by Patricia Wells and Emily Buchanan.
© 2021 – All rights reserved. Please do not reproduce without permission.

Find our more here about why we created this series.

Nourish the Planet: Spring Pea, Garlic, Mint and Buttermilk Soup

 
Pea+and+buttermilk+soup.jpg
 

This vibrant, refreshing soup is a welcome sign of the arrival of spring. The buttermilk here adds a bright, lactic tang and creamy thickness, against the pungent bite of raw garlic and the soothing back notes of fresh mint. The peas are blanched lightly, then refreshed in cold water, to stop them from cooking all the way through. This allows them to hold their color as well as texture. For another variation, try swapping the mint out for sorrel, for a more lemony version.

Nourish notes: If you can, source your milk from a small scale, sustainable farm, but if that is proving tricky try the non-dairy buttermilk version in the notes below.  And don’t forget to save the pea pods to use in preparing vegetable stock.

Spring Pea, Garlic, Mint and Buttermilk Soup

6 servings   |   Equipment: A 5-quart (5 l) pasta pot fitted with a colander; a blender; 6 chilled shallow soup bowls

Ingredients

1 ½ pounds (750 g) fresh peas in their pods, about 2 cups shelled peas (8 ounces; 250 g)
1 tablespoon coarse sea salt
2 plump, moist, garlic cloves peeled, halved, and green germ removed
1 teaspoon fine sea salt
1 quart (1 l) buttermilk, shaken to blend (see Notes)
4 tablespoons finely minced fresh mint leaves, plus more for garnish

Method

1. Shell the peas. You should have about 2 cups (8 ounces; 250 g) shelled peas.

2. Fill the pasta pot with 3 quarts (3 l) of water and bring to a boil over high heat. Add the coarse salt and the peas and blanch, uncovered, for about 2 minutes, counting from the time the peas enter the water. Taste for desired doneness. The peas should still have a touch of crunch. Drain well. With the peas still in the colander, rinse them well under cold running water. This will help the peas retain their bright green color and flavor.

3. In the blender, mince the garlic. Add the peas, fine sea salt, buttermilk, and minced mint. Process to a smooth liquid. Serve in chilled soup bowls, garnished with additional mint. (The soup can be made up to one day in advance, chilled then reblended at serving time.)

NOTES: To prepare homemade buttermilk, combine 1 tablespoon of distilled white vinegar or lemon juice to each 1 cup (250 ml) of whole milk. Stir to blend. The acid will coagulate the milk. The result will not be as thick as traditional butter milk, but if you do not have buttermilk on hand, this may save you an extra trip to the market!

For a non-dairy buttermilk, simmer 1/2 cup (150 g) cashews and 1/2 cup (150 g) of whole almonds in water for 15 minutes. Drain, rinse and pop the almonds out of their skins (discard the skins). In a blender combine the nuts with 1 quart (1 l) water and blend until smooth, about 30 seconds to a minute. Add 4 tablespoons (1/4 cup) freshly squeezed lemon juice to the mixture and stir to blend.


This is a Nourish the Planet recipe, part of a collaborative series by Patricia Wells and Emily Buchanan.
© 2021 – All rights reserved. Please do not reproduce without permission.

Find our more here about why we created this series.

Nourish the Planet: Asparagus Braised with Fresh Rosemary and Bay Leaves

 
Asparagus+braised+with+rosemary-2.jpg
 

We arrived in Provence this week, welcomed by market stands laden with fresh, bright green local asparagus, just in time to mark the official start of spring tomorrow. Braising asparagus, I have found, is the best way to bring out their mineral-rich, woodsy flavors, rewarding you – for their brief season – with rich, haunting pleasures. The pine and floral notes of rosemary backed up by the aromatic bay leaves are an excellent match for asparagus’s earthy character. In this version, I peel each stalk about 1/3 of the way, then slice each stalk into three even pieces. Peeling helps the thicker ends cook at the same time as the rest of the pieces.  At serving time, shower with plenty of minced fresh rosemary for an extra hit of flavor. They don’t need any additional embellishment, trust me!

Asparagus Braised with Fresh Rosemary and Bay Leaves

Equipment: A vegetable peeler; a large skillet with a lid; 4 warmed dinner plates.

Ingredients

16 plump spears (about 2 pounds; 1 kg) fresh asparagus
3 tablespoons extra-virgin olive oil
1 teaspoon coarse sea salt
Several sprigs fresh rosemary, plus more for garnish, minced
Several fresh bay leaves

Method

Rinse the asparagus and only slightly trim the ends. With the vegetable peeler, peel about 1/3 of the way up the stalk. Cut each asparagus into three equal portions. In a skillet large enough to hold the vegetable in a single layer, combine the asparagus, oil, salt, rosemary, and bay leaves. Sprinkle with about ½ cup (125 ml) water. Cover. Cook over high heat just until the oil and water mixture begin to sizzle. Reduce heat to medium and braise the asparagus, turning from time to time, just until the vegetable can be pierced with a knife, 8 to 10 minutes. Do not overcook. (Cooking time will depend upon the thickness of the asparagus.) Garnish with minced rosemary and serve on warmed plates.


This is a Nourish the Planet recipe, part of a collaborative series by Patricia Wells and Emily Buchanan.
© 2021 – All rights reserved. Please do not reproduce without permission.

Find our more here about why we created this series.
Nourish the Planet: Spring Carrots and Lemon Confit

 
Carrot+confit-2.jpg
 

In our quest to bring vegetables to the center of the plate we’re always thinking about different cooking methods that can bring out the true flavor of the ingredients we’re cooking with. In this version of confit spring carrots, this often ordinary vegetable is glamorously bathed in a rich extra-virgin olive oil until soft and tender, emerging succulent and satisfying yet not at all greasy. Choosing a good, forward-flavored Italian olive oil is essential here, as along with the summer savory it adds complex peppery notes.  

This method also works brilliantly with fennel, leeks and even beets, however the cooking times will vary depending on the vegetable and the size you cut them to. We love to serve this on a bed of fresh whipped goat’s cheese, seasoned with fresh thyme, lemon zest, sea salt and Timut pepper, adding a lovely counterpoint of acidity and a natural sauce for the vegetables.  

Note that the quantity of olive oil you need will vary depending on the size of the skillet you use. Aim to mostly cover the carrots with the oil, turning the vegetables from time to time if any are exposed above the oil line. Once the vegetables are cooked, strain and store in a dark glass bottle for reuse in another recipe or to use in a vinaigrette (the oil can be reused for cooking 2-3 times).

Spring Carrot and lemon Confit

4 servings | Equipment: A large deep-sided skillet, with a lid; 4 warmed shallow soup bowls  

Ingredients

About 1 pound (500 g) small spring carrots with their fresh green tops
2 cups (250 ml) best-quality, strong Italian extra-virgin olive oil
2 tablespoons fresh summer savory
2 tablespoons lemon confit, finely minced
Fleur de sel

Method

1. Trim and peel the carrots, keeping the trimmings and peelings for making vegetable stock. Set aside the carrot tops for garnish. Slice the carrots in half lengthwise. Place them in the skillet, cover with the oil, add the summer savory, and cover the skillet. Simmer gently over low heat until the carrots are fondant and can be easily pierced with a knife. Time will vary depending on the size of your carrots but this can take up to 45 minutes to an hour.

2. Using a slotted spoon to drain the carrots, transfer them to the individual shallow soup bowls, discarding the summer savory. Garnish each bowl with the lemon confit and carrot tops. Season with fleur de sel and serve, either as a main vegetable dish or a side to steamed fish or roasted poultry.


This is a Nourish the Planet recipe, part of a collaborative series by Patricia Wells and Emily Buchanan.
© 2021 – All rights reserved. Please do not reproduce without permission.

Find our more here about why we created this series.

Nourish the Planet: Whole Roasted Cauliflower with Tarragon Lime VinaigrettE

 
ROAST+Whole+Baked+Cauliflower+with+Tarragon-Lime+Butter.jpg
 

Once you’ve whole roasted a cauliflower, you won’t want to eat it any other way. The strong heat of a hot oven coaxes out the earthy, smoky and slightly caramelized flavors of this otherwise timid flavored vegetable. Cooked this way, it marries perfectly with a bold-flavored sauce such as a vibrant tarragon lime vinaigrette. Don’t forget that the leaves are entirely edible and also delicious, so serve them alongside the cauliflower wedges.

Whole Roasted Cauliflower
with Tarragon Lime Vinaigrette

6 to 8 servings | Equipment: An 8-quart (8 l) pasta pot fitted with a colander; a small roasting pan.

Ingredients

3 tablespoons coarse sea salt
1 medium cauliflower head
(under 2 pounds/1 kg), including leaves and stalks
Extra-virgin olive oil
Fine sea salt
Coarse, freshly ground black
pepper

For the vinaigrette

4 tablespoons fresh tarragon, finely minced
2 tablespoons freshly squeezed lime juice
1/2 cup extra-virgin olive oil or toasted sesame oil
1/4 teaspoon fine sea salt

Method

1.   Center a rack in the oven. Preheat the oven to 450°F (230°C).

 2.   In the pasta pot, bring 6 quarts (6 l) water to a rolling boil over high heat. Add the coarse sea salt. Place the whole cauliflower in the colander, insert into the boiling water, and blanch, uncovered, for 5 to 6 minutes, or until a sharp knife easily pierces the cauliflower. Remove the colander from the pasta pot, set in a sink, and rinse under cold running water for several minutes to stop the cooking process. (This can be done several hours in advance.)

3.   Pat the cauliflower dry with paper towels or a clean kitchen towel and place it in the roasting pan. Drizzle lightly with olive oil, season with fine sea salt and pepper, and roast until the cauliflower is nicely browned all over, 40 to 50 minutes.

 4.   Transfer the cauliflower to a serving platter, drizzle with the vinaigrette and cut into wedges. Serve with extra vinaigrette.


This is a Nourish the Planet recipe, part of a collaborative series by Patricia Wells and Emily Buchanan.
© 2021 – All rights reserved. Please do not reproduce without permission.

Find our more here about why we created this series.

Nourish the Planet: Sea Scallops with leeks, herbs and kumquat confit

 
Scallops leeks and kumquat confit.jpg
 

Scallops and leeks are a popular French combination, found ubiquitously on French bistro menus from when scallops first appear on menus in October, through to the season’s end in May. The two make a brilliant marriage – the leeks serving as a sweet flavorful background to the dense, meaty scallops. Here, drained yogurt adds richness and a touch of acid. If you’re looking for a new kitchen project, homemade kumquat confit takes this dish to a whole new level, but you can easily sub this out for good-quality store-bought candied citrus if making your own isn’t on the cards. Shower with fresh herbs and you’ll have a dish worthy of any Parisian bistro.    

Nourish notes: Scallops are a great sustainable seafood choice because they feed on natural plankton in the water so they require no external food source. They also tend to be native to the areas they are farmed in so don’t cause imbalances in the marine ecosystems, and don’t require chemicals or antibiotics. Monteray Bay Aquarium Seafood Watch (whose app is really useful) lists nearly all scallops – domestic, imported, farmed and wild – as ‘best choice’ for sustainable seafood. Just be careful to avoid scallops that have been caught using the dredging method, that drags two-ton steel frames with chainmail collecting ‘nets’ behind them, causing huge damage to the seabed habitat and other species. Opt for hand dived scallops which are a much less damaging way of collecting the shellfish.

Sea Scallops with leeks, herbs and kumquat confit

4 servings   |   Equipment: a 5-quart pasta pot fitted with a colander, a large skillet, with a lid; a large nonstick skillet; a splatter guard; a 4-inch (10 cm) pastry cutter; a large slotted spoon;  4 warmed dinner plates

Ingredients

8 leeks, white portion only (keep the green ends for stock)
3 tablespoons coarse sea salt
1/4 cup (60 ml) drained full-fat organic sheep’s milk yogurt
8 large sea scallops (1 1/2 to 2-inches in diameter)
Fine sea salt
Freshly ground white pepper
Several tablespoons Classic Vinaigrette (recipe below)
2 tablespoons finely minced fresh chives
2 tablespoons finely minced fresh flat-leaf parsley leaves
2 tablespoons finely minced fresh summer savory or tarragon leaves
Kumquat Confit (recipe below)
Fleur de sel

Method

1.  Trim, rinse and halve the leeks lengthwise. Cut into thin half-moon
slices.

2.  Prepare a large bowl of ice water.

 3.  Fill a 5-quart pasta pot fitted with a colander with 3 quarts of water and bring to a rolling boil over high heat. Add 3 tablespoons of salt and the leeks. Blanche until crisp-tender, about 1 minute. Immediately remove the colander from the water, allow the water to drain from the leeks, and plunge the colander with the leeks into the ice water so they cool down as quickly as possible. (The leeks will cool in 1 minute. If you leave them longer, they will become soggy and begin to lose flavor). Drain the leeks and wrap them in a thick towel to dry. (The leeks can be cooked several hours in advance. Keep them wrapped in the towel at room temperature.)

 4.  Gently and lightly rinse the scallops and pat dry with paper towels. Remove the little muscle on the side of the scallop and discard. 

5.  At serving time, place the leeks in a large skillet and reheat, adding enough yogurt to evenly coat the leeks. Cover and keep warm over low heat.

 6.  In the non-stick skillet, sear the scallops (using a splatter guard) over high heat just until they brown around the edges, about 1 minute on each side. Season each side after it has cooked. (Cooking time will vary according to the size of the scallops. For scallops that are cooked all the way through, sear for 2 minute or more on each side.) 

7.  On a warmed plate, place the metal pastry cutter in the center, to serve as a mold for the leeks. With the slotted spoon, drain the leeks and arrange in the pastry cutter, pressing down on the leeks. Continue with the remaining servings. Top each with the seared scallops. Drizzle lightly with the vinaigrette. Garnish with herbs and kumquat confit. Season with fleur de sel. Serve.

WINE SUGGESTION: Look for a buttery white wine that has a touch of creaminess. Try the 100% Chardonnay Chablis Domain Bessin, cuvée Montmains. It’s a wine with a highly developed nose, a touch of fattiness, and great expression.  


Kumquat Confit

Makes 1 cup (125 ml)

Ingredients

2 cups (300 g) kumquats
1 ½ cups (250 g) organic cane sugar
1 cup (125 ml) water
½ cup (60 ml) organic lemon juice
1 teaspoon chopped fresh ginger or dried ginger powder
1 whole cinnamon stick
6 whole cloves
½ teaspoon fine sea salt

Method

1.  Rinse, and halve all of the kumquats lengthwise. Very carefully remove as many
seeds as you can, using a small sharp knife. (This can easily take 15 minutes or more!)

2.  In a large saucepan, combine the kumquats and the remaining ingredients and set aside to marinate for 15 minutes.

3. Place the saucepan with the kumquats over medium heat and bring to the boil. Reduce the heat and cook, uncovered, for 30 minutes, stirring regularly. Remove from the heat and let cool for 10 minutes. Strain out the kumquats and inspect for any recalcitrant seeds. Remove them! Return the fruit to the sauce. Transfer to an airtight container. Serve as a side condiment to cheese, on toast, with cooked poultry or scallops! Store in an airtight container in the refrigerator for up to 3 months.  


Classic Vinaigrette

Makes about 1 1/4 cups    |   Equipment: A small jar with a lid

Ingredients

2 tablespoons best-quality sherry-wine vinegar
2 tablespoons best-quality red-wine vinegar
Fine sea salt to taste
1 cup extra-virgin olive oil

Method

1.     In the jar, combine the vinegars and salt. Cover with the lid and shake to dissolve the salt. Add the oil and shake to blend. Taste for seasoning. The dressing can be used immediately. (Store the vinaigrette at room temperature or in the refrigerator for several weeks. Shake to blend again before using.)


This is a Nourish the Planet recipe, part of a collaborative series by Patricia Wells and Emily Buchanan.
© 2021 – All rights reserved. Please do not reproduce without permission.

Find our more here about why we created this series.

Nourish the Planet: Wild Mushroom Pasta

 
Wild+mushroom+pasta-2.jpg
 

If you haven’t experimented with wild mushroom powder, now is the time to start. The secret weapon of the spice drawer, this powder is the key to infusing food with the magic of the wild mushroom flavor and a great way to get the most of these expensive treasures.

Here, homemade vegetable stock is infused with the mushroom powder then combined with a duo of roasted fresh shiitake and portobello mushrooms (roasting, rather than offers a more dense and intense mushroom flavor) and finally tossed with an earthy, full-flavored spelt pasta, made with the nutty French épeautre or Italian farro.

Wild Mushroom Pasta

4 servings / Equipment: A baking sheet; a large, deep skillet with a lid; a 5-quart (5 l) pasta pot fitted with a colander; 4 warmed shallow soup bowls  

Ingredients

1 pound (500 g) mixed mushrooms, such as shiitake and portobello, trimmed and wiped clean with a damp kitchen cloth
6 tablespoons toasted sesame oil or extra-virgin olive oil
1 teaspoon fine sea salt  
3 tablespoons Cèpe Mushroom Powder (see Note)
1 cup (250 ml) Vegetable Stock
2 tablespoons coarse sea salt
8 ounces (250g) corkscrew-type spelt pasta, such as rotini  
Grated Pecorino sheep’s milk cheese, for garnish
Fresh parsley leaves, for garnish

Method

1.     Preheat the oven to 400°F (200°C).

2.     Cut the mushrooms lengthwise into thick slices. In a bowl, toss the mushrooms with the oil and salt. Spread them in an even layer on the baking sheet and roast until tender and golden brown, about 15 minutes.

3.     Meanwhile, in the skillet (one large enough to hold the mushrooms and pasta later on) combine the vegetable stock and mushroom powder. Bring to a simmer, cover, and remove from the heat. Set aside for 10 minutes to infuse the stock.

4.     Fill the pasta pot with 3 quarts (3 l) of water and bring to a rolling boil over high heat. Add the coarse salt and the pasta, cooking until a dente, or slightly resistant to the bite, according to package instructions. Drain the pasta quickly in the colander, but do not shake off every drop of water. Reserve the pasta water to add as necessary to the cooked pasta and sauce. Immediately transfer the pasta to the skillet with the stock. Add the mushrooms. Stir to coat the pasta with the mushrooms and sauce, adding additional reserved pasta water as necessary. Cook until the sauce thickens and easily coats the pasta. Taste for seasoning.

5.     Transfer the pasta to the warmed bowls, garnishing with grated Pecorino and parsley. Serve immediately.

Note: To prepare cèpe powder, coarsely chop or cut with scissors about 2 ounces (30 g) of best-quality dried cèpe (porcini) mushrooms. Working in batches, grind them to a fine powder in an electric spice mill. This should yield about 8 tablespoons of powder. Store the powder in a small jar, tightly sealed, in a cool, dry place, for up to 6 months.


This is a Nourish the Planet recipe, part of a collaborative series by Patricia Wells and Emily Buchanan.
© 2021 – All rights reserved. Please do not reproduce without permission.

Find our more here about why we created this series.

Nourish the Planet: Cauliflower and Coconut Curry

 
Cauliflower and chickpea curry-2.jpg
 

This golden, fragrant, curry with its avalanche of spices (including our favorite, hot, homemade Madras curry powder) has become an instant family favorite. The contrast of tangy tomatoes and yogurt, creamy coconut milk, soothing chickpeas and warming spices creates a beguiling combination. Paired with basmati rice cooked with cardamom pods, it’s like a quick trip to India. Try semi wholegrain basmati if you can find it, which has the subtle nutty flavor of white basmati while still retaining much of the healthful fiber and minerals of wholegrain rice.

Nourish notes: Try to seek out organic fair-trade coconut milk that has been farmed sustainably, as crops farmed on deforested land have a much higher environmental impact.

Cauliflower and Coconut Curry

6 servings | Equipment: A 10-quart (10 l) pasta pot, fitted with a colander; a large, heavy duty cast-iron pot with a lid; 6 warmed, shallow soup bowls

Ingredients

1 large cauliflower (about 2 pounds; 1 kg)
3 tablespoons coarse sea salt
3 tablespoons extra-virgin olive oil
1 large onion, peeled, halved, cut into half moons
4 plump, moist cloves garlic, minced
1 tablespoon turmeric
1 heaping tablespoon toasted, ground cumin
1 heaping teaspoon Madras curry powder (recipe below)
½ teaspoon ground Cayenne pepper
One 14-ounce (400 g) can Italian tomato pulp (Mutti brand preferred)
1 cup (250 ml) organic, fair trade coconut milk
4 cups (1 l) cooked chickpeas
1 cup (250 ml) organic sheep’s milk yogurt
3 cups 750 ml) cooked basmati rice, cooked with 5 whole cardamom pods
Fresh coriander (cilantro), for garnish

Method

1.     Trim the cauliflower, keeping the leaves for the curry or reserving them for stock along with the thick stalk. Break the cauliflower head into small florets. Blanch the florets (and leaves if using): In the pasta pot, bring 8 quarts (8 l) of water to a rolling boil over high heat. Add the salt and the cauliflower and cook for 5 minutes. Remove from the heat, drain and set aside.

2.     In the large pot, combine the oil, onions, and garlic and sweat – cook, covered, over low heat until soft – 3 to 4 minutes. Add the turmeric, cumin, curry powder, and Cayenne pepper and cook 1 more minute to toast the spices. Add the tomatoes, coconut milk, chickpeas, the blanched and refreshed cauliflower, and about 1 cup (250 ml) of water. Cover and cook for 15 minutes. If the mixture seems dry, add additional water to thin it out. Stir in the yogurt. Taste for seasoning. Serve with a spoonful of cardamom-scented basmati rice in each of the warmed soup bowls and garnish with fresh coriander.


Homemade Madras Curry Powder

Makes 2/3 cup (160 ml)    |   Equipment: A large, nonstick skillet

 
Madras+Curry+Powder+Spices.jpg
 

Ingredients

3 tablespoons coriander grains
3 tablespoons cumin seeds
2 tablespoons black peppercorns, such as Indian Tellicherry
1 tablespoon black mustard seeds
1 tablespoon fenugreek grains
10 fresh or dried curry leaves or kaffir lime leaves
8 cardamon pods
4 small dried chile peppers
2 teaspoons ground cinnamon
1 tablespoon turmeric powder
1 tablespoon ground Cayenne pepper

Method

In a skillet, combine the coriander, cumin, peppercorns, mustard seeds, fenugreek, curry leaves, cardamon pods and chile peppers. Toast over modern heat until fragrant, 2 to 3 minutes. Transfer to a plate to cool. Once cooled, combine all the curry powder ingredients in a spice mill and grind to a fine powder.

Transfer to a small spice jar and store in a cool place up to 6 months.


This is a Nourish the Planet recipe, part of a collaborative series by Patricia Wells and Emily Buchanan.
© 2021 – All rights reserved. Please do not reproduce without permission.

Find our more here about why we created this series.

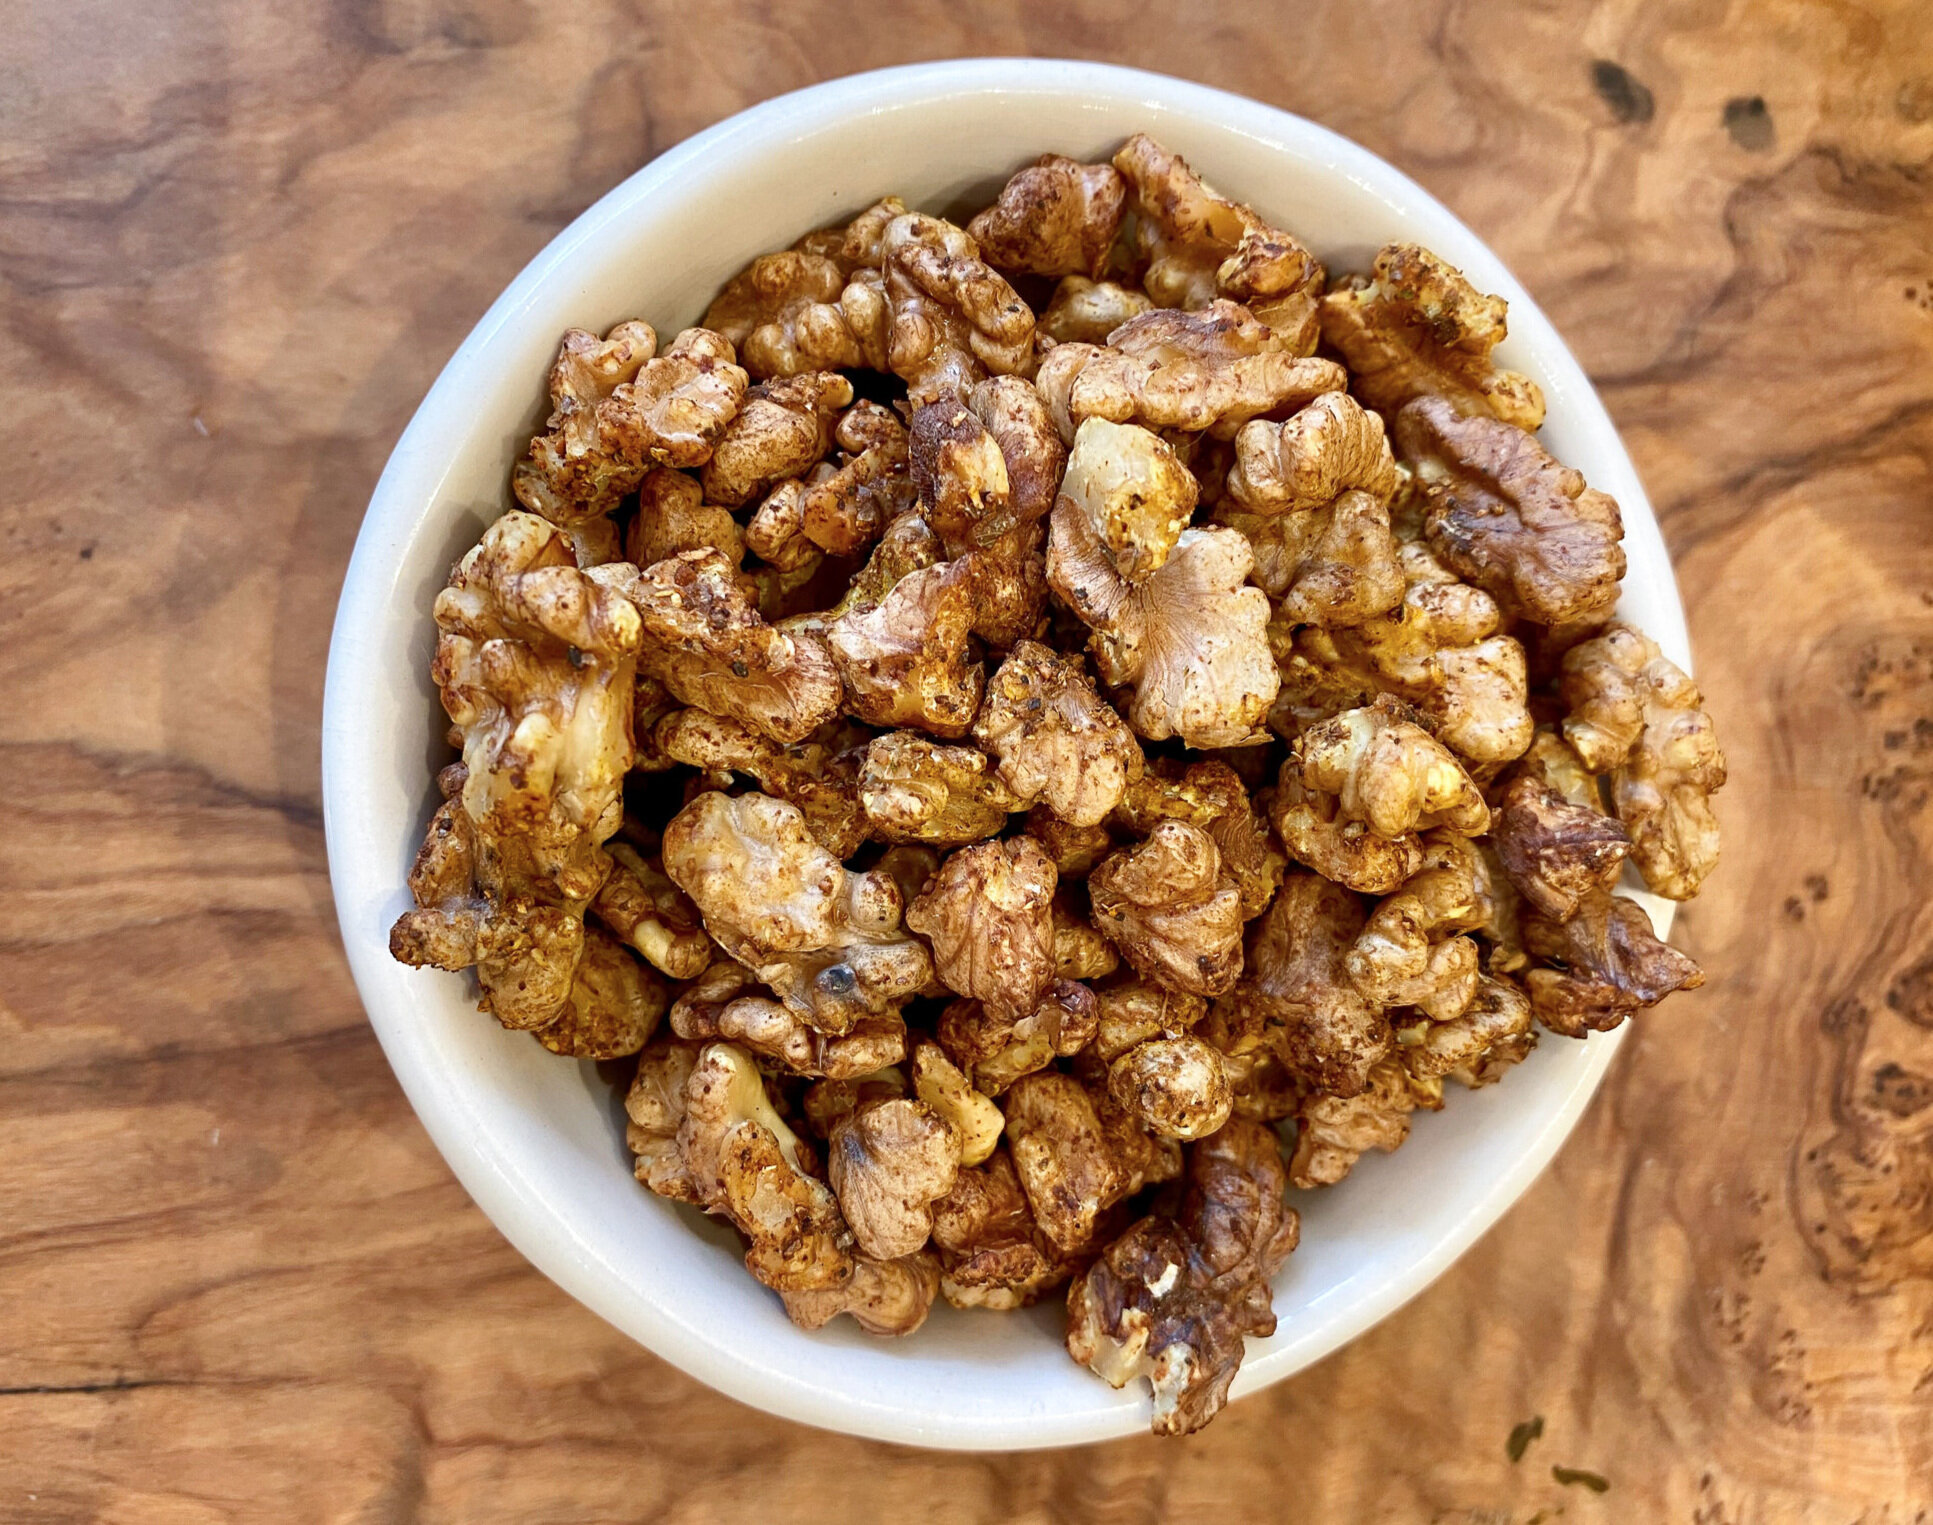
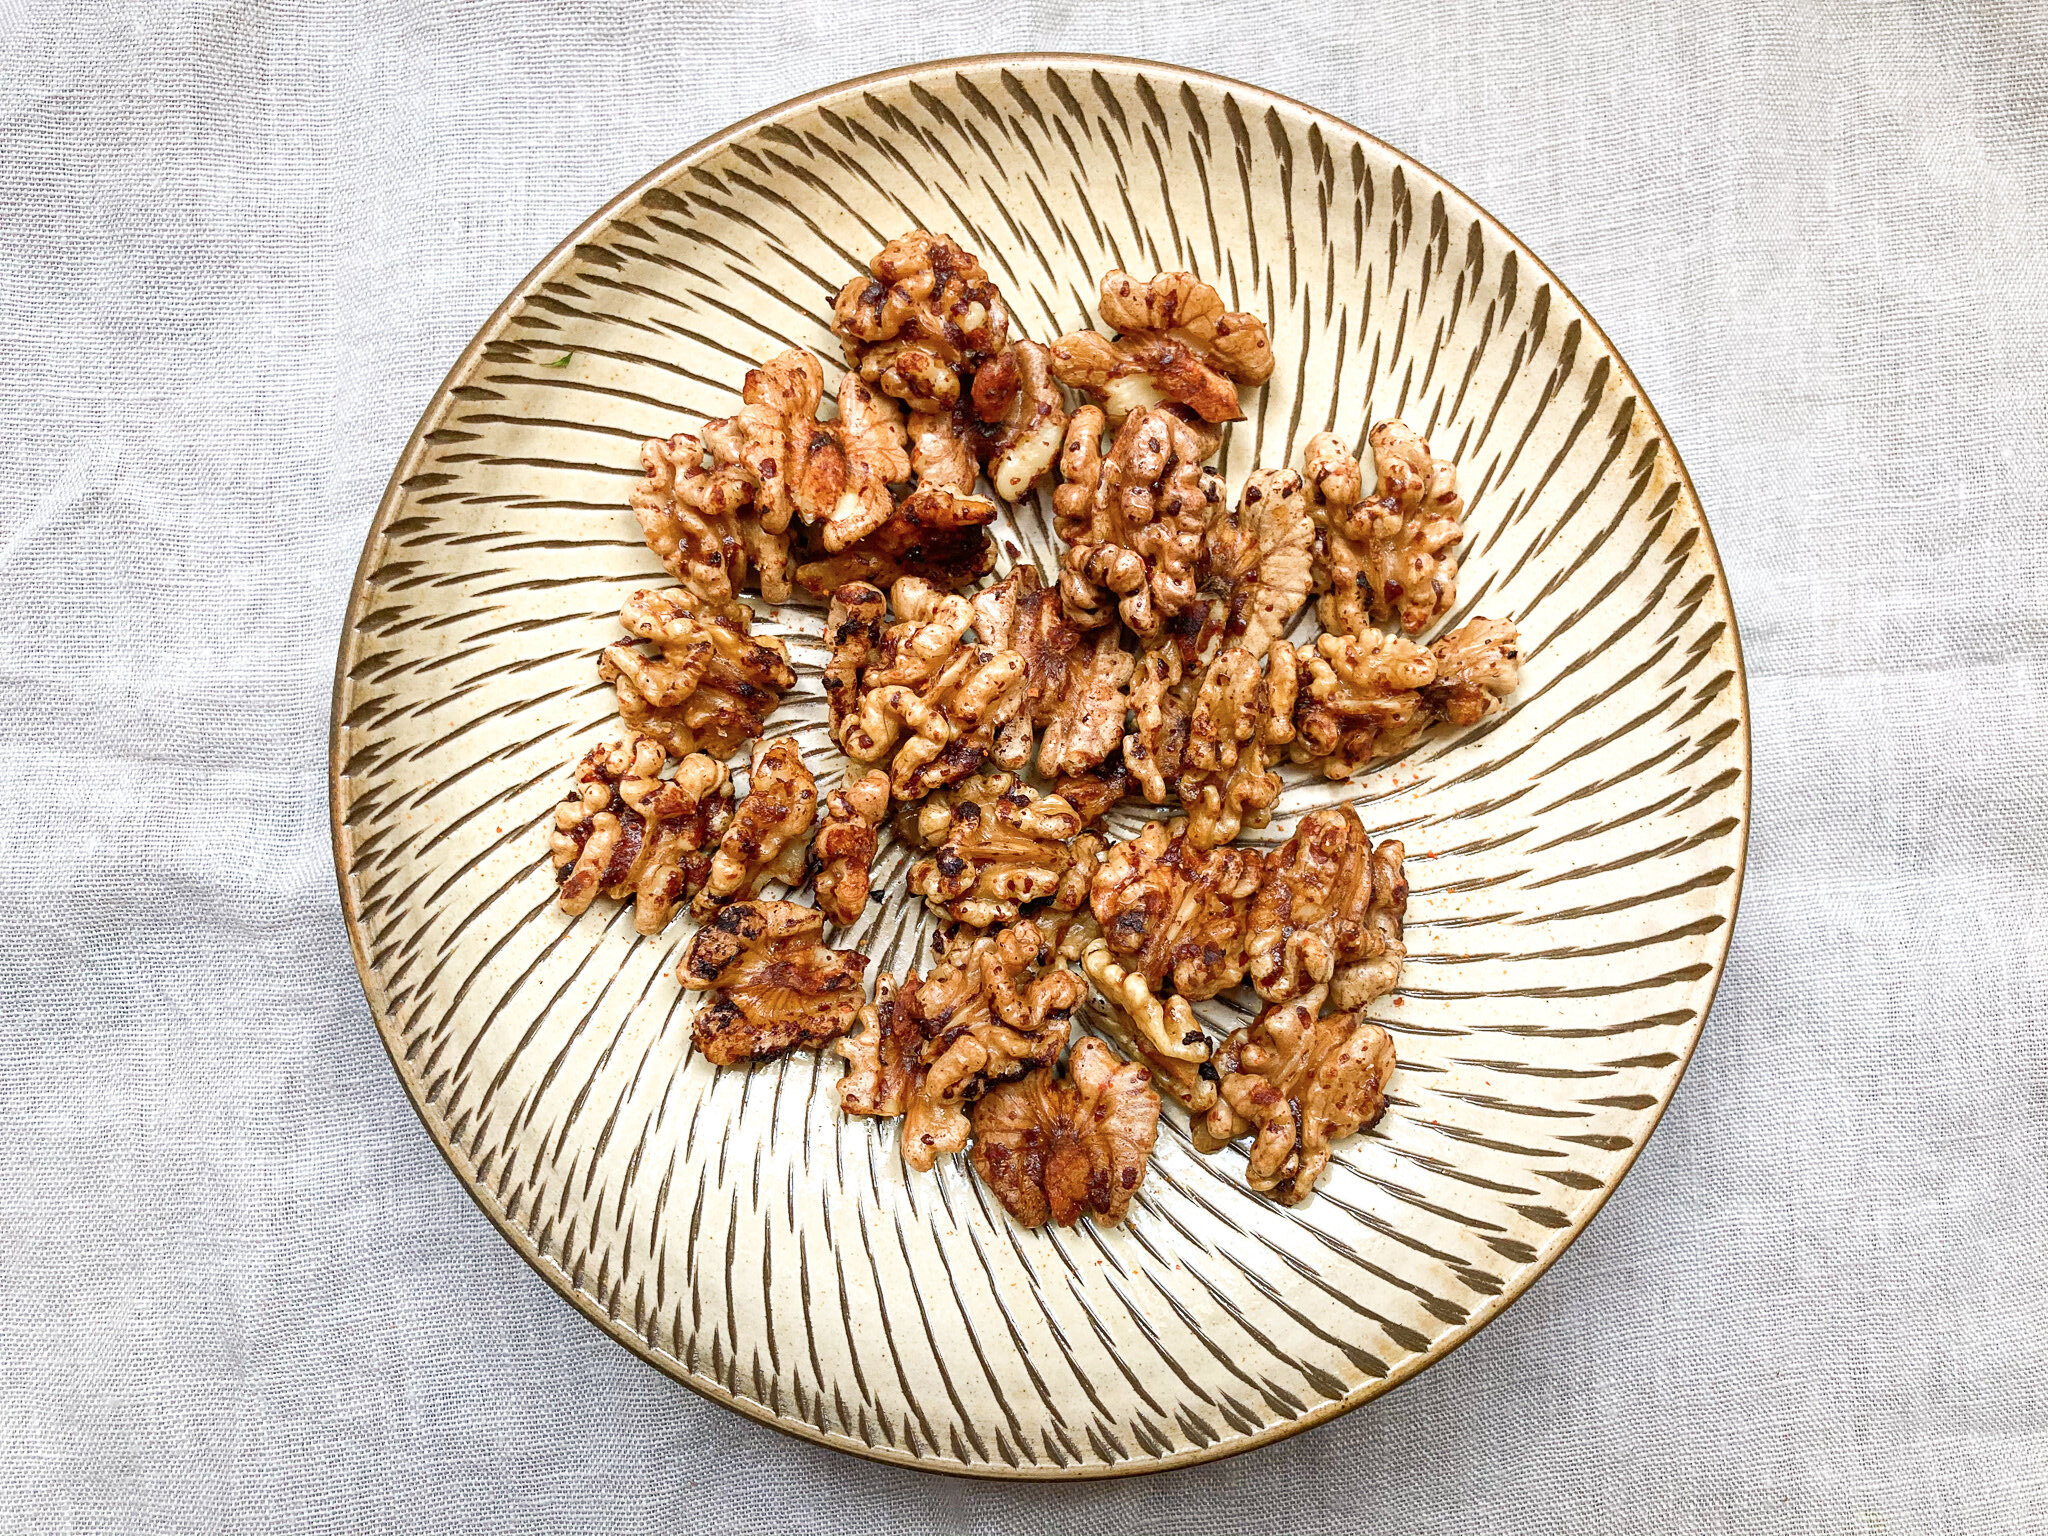
Nourish the Planet: Toasted Walnuts


These brightly flavored, healthy toasted walnuts are one of those pantry staples that you’re always pleased to have on hand – as an appetizer, to accompany a cheese course, toss through a salad, or simply as a quick savory snack on its own. We’ve included two easy versions here, but get creative and add a favorite spice mix or chili flavor to make it your own.

TOASTED WALNUTS – TWO WAYS

Equipment: A baking sheet

Ingredients

For Curried Walnuts

2 cups (250 g) organic walnut halves
1 tablespoon organic Japanese tamari sauce
2 teaspoons Madras curry powder


For Spicy Tamari-Miso Walnuts

2 cups (250 g) organic walnut halves
2 tablespoons Japanese tamari sauce
2 tablespoons extra virgin olive oil or sesame oil
1 teaspoon miso paste
1/2 teaspoon nanami togarashi (Japanese 7-spice blend)

Method

1.   Center a rack in the oven. Preheat the oven to 350°F (175°) C.

2.   To make Curried Walnuts: In a medium bowl, combine the walnuts and tamari, tossing to coat the nuts evenly. Add the curry powder and toss once again.

To make Spicy Tamari-Miso Walnuts: In a medium bowl, combine the tamari, oil and miso and stir to combine. Add the walnuts and toss to coat evenly. Add the nanami togarashi and toss once again.

3. Spread the nuts in a single layer on the baking sheet. Place in the oven and bake until the nuts are fragrant and toasted, 8 to 10 minutes. Remove from the oven and transfer the nuts to a dish to cool. Store in an airtight container at room temperature up to 2 weeks.


This is a Nourish the Planet recipe, part of a collaborative series by Patricia Wells and Emily Buchanan.
© 2021 – All rights reserved. Please do not reproduce without permission.

Find our more here about why we created this series.

Nourish the Planet: Two Potato and Thyme Gratin

 
Two+potato+and+thyme+gratin.jpg
 

Continuing cold winter days call for comfort food, and what is more comforting than crunchy-edged slow-baked potatoes? Gratin used to describe those delicious bits of caramelized food that become encrusted onto the side of the dish, to be gratté (scraped off) and enjoyed as a tasty morsel. As a dish, it refers to the golden crust that forms on top of the food as it bakes in the oven. Here, thin slices of yellow-fleshed potatoes and brilliant orange sweet potatoes are layered with red onion and cooked long in the oven to create a simple yet deeply comforting winter dish. No cream needed here, just top-quality vegetables, olive oil, and thyme/time.


Two Potato and Thyme Gratin

Serves 4 | Equipment: small, oven-proof baking dish

Ingredients

350 g small, yellow-fleshed potatoes (such as Yukon Gold), thinly sliced (about 2mm thick, setting 2 on an oxo mandolin slicer)
350 g small sweet potatoes, thinly sliced (about 2mm thick, as above)
1/2 small red onion, peeled and thinly sliced
1/4 cup extra virgin olive oil
3/4 teaspoon sea salt
Several sprigs of fresh thyme, leaves removed from the stalks

Method

1. Center a rack in the oven. Preheat the oven to 165°C (350°F).

2. Rub the bottom of the baking dish with a small amount of oil. Layer the potatoes, alternating between slices of the potato and sweet potato, in a layer to over the bottom of the dish. Scatter over half of the sliced onion, season with a sprinkling of fresh thyme and sea salt. In a very thin stream, drizzle the layer with about a third of the olive oil.

3. Repeat with a second layer of potato slices, the remaining onion, another sprinkling of thyme and salt and a third of the olive oil. Finish with a final layer of potatoes, thyme, salt and the remaining oil.

4. Bake in the oven for 2 hours, until a knife easily pierces all the potato layers and the top is golden and crispy.


This is a Nourish the Planet recipe, part of a collaborative series by Patricia Wells and Emily Buchanan.
© 2021 – All rights reserved. Please do not reproduce without permission.

Find our more here about why we created this series.

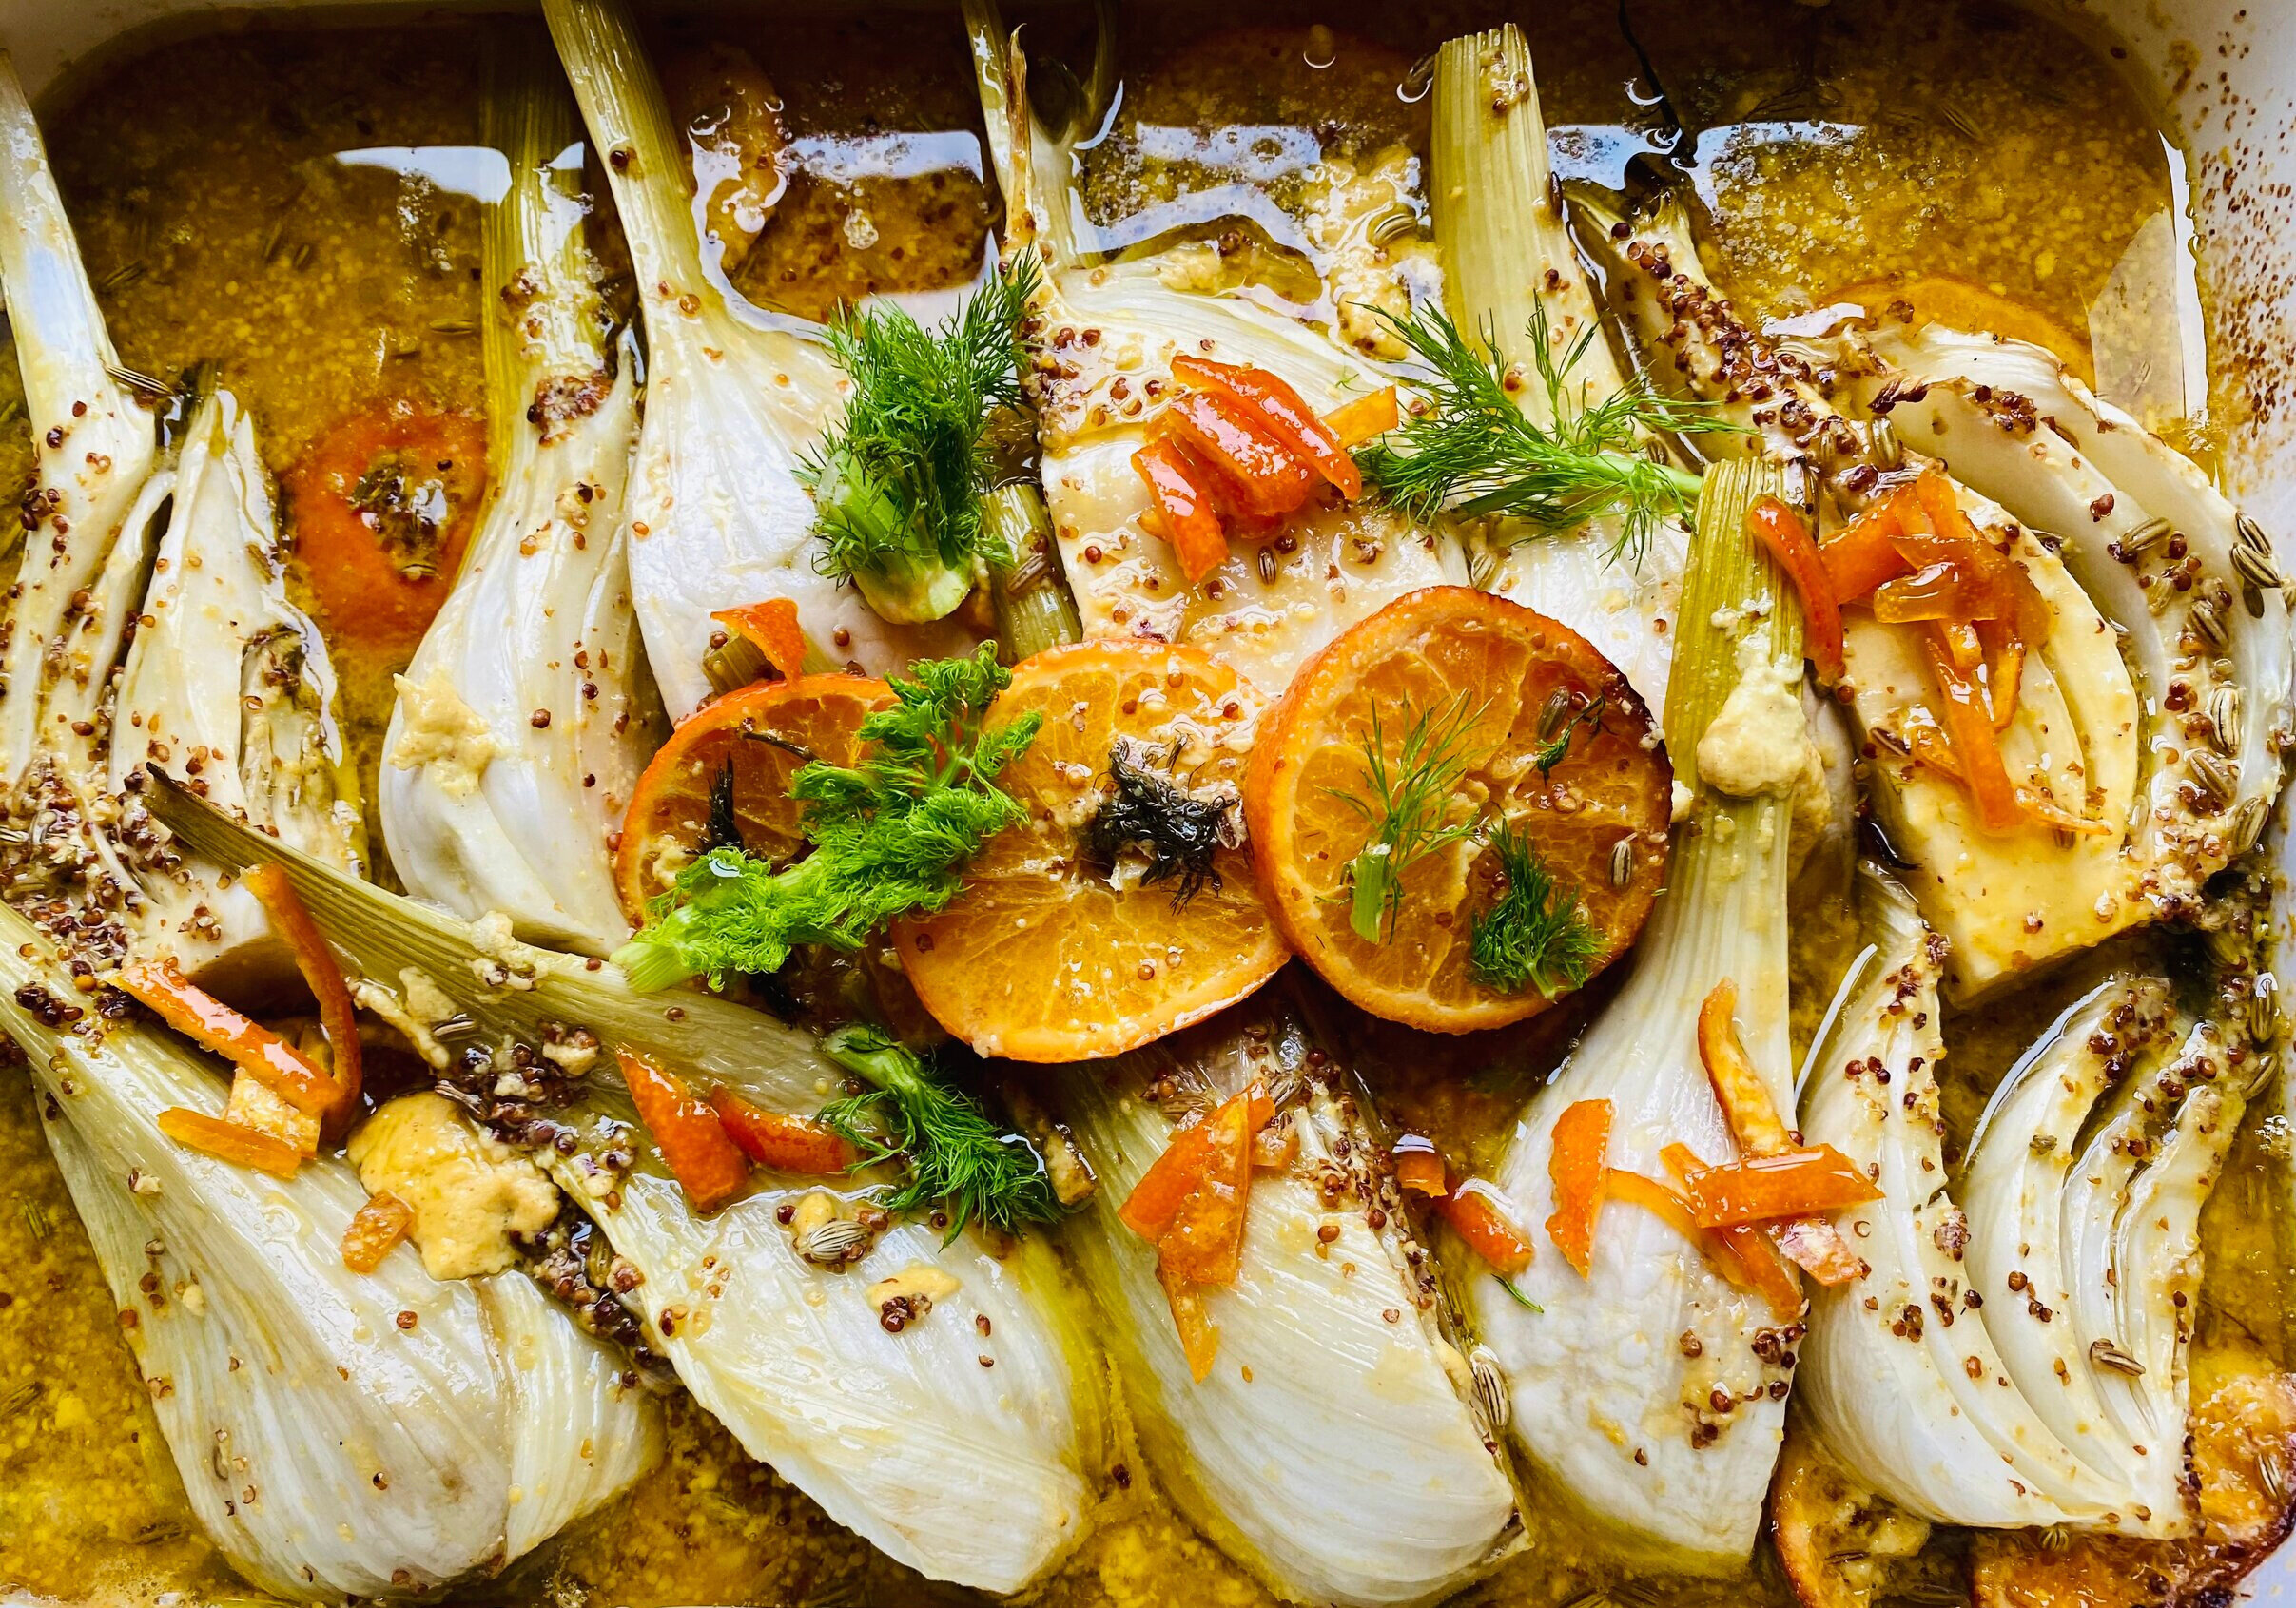
Nourish the Planet: Braised Fennel with Clementines, Candied Clementines and Fresh Fennel Fronds

 
Braised fennel and clementines.jpg
 

If you’re needing a bright, sunshine-filled meal to uplift the dark January days of winter, then this recipe will do just that! Inspired by chef Yotam Ottolenghi’s recipe for chicken with clementines and fennel, here these wholesome colorful vegetables take center-stage. The marinade, a full-flavored blend of anise liquor, olive oil, citrus juice, mustard and fennel seeds becomes a star of its own once it’s reduced and then reunited with the citrus and fennel. The candied clementine adds an extra touch of brightness and the shower of fresh fennel fronds completes the drama.

Clementines – the most prized perhaps are the ones grown on the island of Corsica – are a hybrid created in the 19th century in France marrying mandarins and sweet oranges. They are the fourth most consumed fruit in France, and no wonder: they are seedless, richly flavored, and easy to peel.  If organic clementines aren’t available, use best-quality organic oranges, as other citrus – limes or lemons – can sometimes turn bitter in this preparation.

Braised Fennel with Clementines, Candied Clementines and Fresh Fennel Fronds

8 servings | Equipment: A large, shallow baking dish, about 10 by 14-inches (25 x 36 cm)

Ingredients

2 pounds (1 kg; about 2 large bulbs) fennel bulbs

The marinade:

1 cup (125 ml) pastis (anise-flavored liquor)
1 cup (125 ml) extra-virgin olive oil
1 cup (125 ml) organic clementine juice (or orange juice)
3 tablespoons coarse-grained mustard
2 tablespoons fennel seeds
1 tablespoon fine sea salt

6 clementines or 4 oranges, trimmed and cut into thin crosswise slices
Candied clementine (recipe below) and fennel fronds, for garnish

Method

1. Trim the fennel bulbs, reserving any fennel fronds for garnish. Quarter the bulbs lengthwise, then cut each quarter in half, for 8 slices per bulb. Set aside.

2. In the baking dish combine the marinade ingredients and stir to combine. Layer the citrus slices in the marinade. Layer the sliced fennel bulbs on top of the citrus. Securely cover the baking dish with foil and marinate in the refrigerator at least 1 hour or up to 12 hours.

3. Preheat the oven to 375°F (190°C).

4. With the baking dish still covered with foil, place in the center of the oven and braise, basting from time to time, until the fennel is softened but still has a bit of crunch, for a total of 45 minutes to 1 hour.

5. Remove from the oven and carefully drain off the liquid, transfering it to a small saucepan. Reduce the liquid by about half. Pour it over the fennel, garnishing with candied clementines and fennel fronds.


Candied Clementines

Ingredients

3 organic clementines or oranges
1/3 cup organic clementine juice or orange juice
3/4 cup (150 g) organic cane sugar

Method

1.     Halve the citrus crosswise. With a knife, trim off and discard the tips of both ends of the citrus so that they will stand up flat in a cutting board. With the knife, cut the peel and white pith lengthwise end-to-end into wide, 2-inch (5 cm) strips. Cut those strips lengthwise into 4 thin strips.

 2.     Fill a 3-quart (3 l) saucepan with 1 quart (1 l) of water. Bring to a boil over high heat. Add the peel. Blanch for 5 minutes. Drain, passing through a fine-mesh sieve, discarding the water. Repeat with fresh water 2 more times. (This helps soften the citrus and remove any bitterness in the peel or pith.)  

3.     In a small saucepan, combine the citrus juice, the sugar and 1/4 cup (60 ml) of water. Bring to a simmer over moderate heat and stir to dissolve the sugar, about 1 minute. Add the peel, return to a simmer and cook, uncovered, until the mixture has thickened lightly and reduced to about 3/4 cup (185 ml), about 10 minutes. Transfer to a covered container and refrigerate up to 1 month.

 To use the candied peel on its own, without the syrup, remove from the sauce and drain. The candied peel can be used in any recipe calling for candied citrus.


This is a Nourish the Planet recipe, part of a collaborative series by Patricia Wells and Emily Buchanan.
© 2021 – All rights reserved. Please do not reproduce without permission.

Find our more here about why we created this series.

Nourish the Planet: Potage Parmentier and Leek 'Tempura'

 
Leek and potato soup-2.jpg
 

There are few French soups as classic and simple as the wintry combination of leeks and potatoes, a dish known as potage Parmentier, named after Antoine-Augustin Parmentier, the Frenchman who popularized the potato in France.

The ubiquity of potato-based dishes might have you believe that it has always been a staple of French cuisine, yet before this 18th-century pharmacist/agronomist began promoting its nutritional and culinary benefits, it was used only as animal feed and was believed to cause leprosy. It was only through years of research and potato campaigning (that even included potato-themed supper clubs for celebrity guests) that the French finally began to accept the humble potato as a safe and delicious ingredient.

Why tell this story? In our hectic lives, grabbing familiar ingredients from supermarket shelves without a second thought, we can easily forget the value of our food – how it was produced or the culinary history of how it arrived at our table to nourish us. Knowing the history of food, how it has traveled to us through time as well as space, brings a dish alive and helps us to connect to it on a deeper level. So perhaps as you prepare this inexpensive and healthy soup you can imagine the revolutionary Parmentier gifting bouquets of potato blossoms to Queen Marie-Antoinette and King Louis XVI and paving the way for the invention of the French fry.

While most classic versions embellish the preparation with cream and milk, we find that if you choose top-quality vegetables and a sturdy, rich vegetable or chicken stock, you can easily forego the dairy.

Here we use only the white part of the leeks, saving the green tops to create a crunchy zero-waste garnish. Of course it’s more of an inspired-by version than a true tempura, tossing blanched leek tops in arrowroot or cornstarch and frying in olive oil to give a light crispy exterior to the soft vegetable interior.

If you don’t have time to make the topping, save the green tops in freezer to add to a flavorful stock.

Potage Parmentier: Leek and Potato Soup

4 servings as a main, 8 as a starter   |   Equipment: A large, heavy stockpot; a small saucepan; a clean kitchen towel; a small sieve; a small nonstick skillet; a blender; 8 warmed, shallow soup bowls

Ingredients

1 onion, peeled and cut into thin half moons
5 tablespoons extra-virgin olive oil
1/2 teaspoon fine sea salt and more to taste
1 pound (500 g) waxy potatoes, such as Yukon gold, cubed (do not peel)  
1 pound (500 g) white part of leeks, halved lengthwise, cut into thin half moons
1 1/2 quarts (1.5 l) rich chicken or vegetable stock
4 fresh bay leaves

Garnish

1/2 teaspoon sea salt
Green leek tops, rinsed and cut into thin 1 inch (2-3cm) strips
2-3 tablespoons arrowroot or cornstarch,
3 tablespoons extra virgin olive oil, plus extra if needed

Method

1.     In the stockpot, combine the onions, oil, and salt and stir to coat the onions with the oil. Sweat – cook, covered, over low heat until soft – about 5 minutes. Add the potatoes and leeks and and cook until they begin to soften, stirring regularly, about 5 minutes. Add the stock and bay leaves and cook until the vegetables are soft, about 25 minutes. 

2.     To make the garnish: While the vegetables are cooking, bring 1/2 cup (125 ml) water to a boil in the small saucepan and add the sea salt. Quickly blanch the leek strips in the water until soft, about 1 minute. Strain and pat the leeks dry with a clean kitchen towel.

3.     Place the arrowroot in a small bowl and add the blanched leek strips, tossing to coat completely. Spoon the strips into the sieve and lightly shake to remove the excess arrowroot. Heat the olive oil in the small skillet over medium-to-high heat. Add the leeks strip-by-strip, so they don’t bunch together and toss in the olive oil. Fry until crispy, about 30 seconds to a minute. Be careful as they can burn quickly. Remove from the pan and set aside. Lightly season with sea salt. Note, you may need to fry in batches, adding extra olive oil as needed.

4.     Once the potatoes and leeks are cooked through, take off the heat and remove and discard the bay leaves. Transfer the mixture to the blender and blend until smooth. Taste for seasoning. To serve, pour into the warmed soup bowls and garnish with the leek tempura.


This is a Nourish the Planet recipe, part of a collaborative series by Patricia Wells and Emily Buchanan.
© 2021 – All rights reserved. Please do not reproduce without permission.

Find our more here about why we created this series.
Nourish the Planet: Panpetato Walnut Bites

 
Panpepato.jpg
 

Looking for some simple, make-ahead Christmas inspiration this week? Try these totally irresistible rich, crunchy walnut bites. A darker, sturdier, more rustic version of the Italian panforte, they offer a pungent, forward flavor, royally laced with freshly ground black pepper, cinnamon, cocoa powder, candied ginger, black currants, and walnut halves. Panpepato – literally peppered bread – was created in the 17th century when Italy began importing spices from Asia. Spices became a sign of wealth, and this spiced sweet quickly became a Christmas specialty. There are many variations, and some might include a mix of almonds, hazelnuts, and pine nuts, and a dose of nutmeg. Some are even covered with a layer of chocolate icing.

This version is ideal as an addition to a cheese course (a nicely aged Parmiggiano-Reggiano and a sip of vin santo works for us), teamed up with a slice of aged sheep’s milk cheese (stack the two on a toothpick and serve as an appetizer), or serve it as the crunchy companion to a light sorbet for something altogether different.

Walnut Bites: Italian Panpepato

Makes about 42 (1 ½ inch; 3 cm) bites
Equipment: a 9 x 9 -inch (23 x 23 cm) baking pan, lined with baking parchment

Ingredients

1/2 cup (70 g) organic dried black currants
3 tablespoons sweet red wine, such as vin santo, vin doux naturel
2 tablespoons (30 g) unsalted butter
3/4 cup (150 g) organic muscovado sugar
1/4 cup (60 ml) intensely-flavored organic honey, such as chestnut
1/2 teaspoon fine sea salt
1 cup (125 g) organic candied ginger, cut into tiny cubes
2 cups (200 g) organic walnut halves
3 dried organic figs, stems removed, chopped
1/4 cup (40 g) organic spelt flour
1 tablespoon coarse, freshly ground black pepper (such as Timut)
1 tablespoon organic unsweetened cocoa powder
1 teaspoon ground cinnamon, preferably Vietnamese cassia

Method

1.   In a small bowl, soak the currants in the wine for about 20 minuters to soften the fruit.

2.   Center a rack in the oven. Preheat the oven to 350°F (180°C).

3.   In a small saucepan, melt the butter over low heat. Add the sugar, honey, and salt, heating just until blended. Cool slightly.  

4.   In a large bowl, combine the currants and wine. Add the candied ginger, walnuts, and figs and stir to evenly coat all three. In another small bowl, combine the flour, pepper, cocoa powder, and cinnamon, and stir to blend. Add the flour mixture to the currant mixture. Stir to evenly coat the mix. Add the butter mixture and stir again to blend evenly. The mixture will be very dense and sticky. Spoon the mixture into the parchment-lined pan and smooth it out with a spatula, pressing down to compact it well.  

5.   Place the pan in the oven and bake until bubbly, dark, and fragrant, 30 to 35 minutes. The walnut bites will be sticky and soft, but will firm up as they cool in the pan.  

6.   Once cooled, cut the panpepato into small squares. (Store in an airtight container at room temperature for up to 3 weeks.)


Wine suggestion

These work beautifully with a glass of Champagne as an appetizer. If serving with a cheese course, try an Italian vin santo, or a French vin doux naturel, such as the Grenache-based Rasteau from the southern Rhône.


This is a Nourish the Planet recipe, part of a collaborative series by Patricia Wells and Emily Buchanan.
© 2020 – All rights reserved. Please do not reproduce without permission.

Find our more here about why we created this series.
Nourish the Planet: Sautéed Mushrooms and Mushroom Pâté

 
Mushroom pâté.jpg
 

We love efficiency in the kitchen, and at such a busy time of year, versatile recipes that can become several different meals are high on the priority list. So this week we’re offering a sauteed mushroom recipe that can be served as a woodsy, satisfying side dish, transformed into a fragrant pasta sauce, or combined with ricotta and pecorino cheese to make a vegetarian-perfect pâté – a most impressive trompe-l’oeil appetizer to be eaten with homemade crackers, as a side dish, or even as a main dish served with a green salad.

Nourish note: Never toss the liquid used to plump dried mushrooms. It can always be used to season soups and sauces or as a base for a rich umami broth. Just be certain to thoroughly rinse the mushrooms before and after soaking, and strain the soaking liquid through cheesecloth, for dried mushrooms almost always contain a bit of sand or dirt.

Sautéed Mushrooms and Mushroom Pâté  

8 servings | Equipment: A large, deep, heavy duty skillet with a lid; a food processor; several ramekins  

Ingredients

For the sauteed mushrooms

2 cups (2 ounces; 60 g) dried cêpe mushroom pieces
3 tablespoons toasted sesame oil or extra-virgin olive oil  
3 shallots, cut into thin rings
4 cloves garlic, minced
Fine sea salt
8 ounces (250 g) fresh shiitake mushrooms, rinsed, trimmed, coarsely chopped
Freshly ground black pepper, such as Timut  
1 cup (125 ml) heavy cream (optional)

For the pâté

8 ounces sheep’s milk ricotta cheese
3 tablespoons pecorino pepato cheese  

For garnish

A  generous shower of fresh thyme
A spice mix of equal parts ground ginger, cinnamon, and nutmeg
A generous coating of an expressive black pepper such as coarsely ground Voatsiperifery

Method

1.     Place the dried mushrooms in a sieve and rinse thoroughly with hottest possible tap water. With the mushrooms still in the sieve, place the sieve in a cup with a pouring spout and fill the cup with hot water. Set aside to soften, about 10 minutes.

2.     In a large skillet, combine the oil, shallots, garlic, and salt and sweat – cook, covered, over moderate heat – until soft. Do not let the shallots or garlic brown. Add the shiitake mushrooms and cook until soft, about 5 minutes.

3.     Once the dried mushrooms have softened, rinse them one more time in the sieve. Add the mushrooms to the skillet, making sure to save the soaking liquid. Continue cooking the two mushrooms in the skillet until soft.

4.     For the mushroom soaking liquid: Place a piece of cheesecloth over the sieve and carefully filter the mushroom draining liquid into another vessel. Set aside and save as a broth. (If preparing the sauteed mushroom mixture as a vegetable side dish stop here.)

5.     FOR SAUTEED MUSHROOM SAUCE: With the mushrooms still in the skillet, add enough of the strained mushroom soaking liquid to make a generous sauce. If desired, add additional cream to taste. Season generously with pepper. Taste for seasoning.

6.     FOR THE MUSHROOM PATE: Transfer the mushrooms in the skillet to the food processor. Add the ricotta cheese, Pecorino pepato and process to blend. Taste for seasoning. Transfer the pâté to ramekins and garnish with any of the suggested garnishes.


This is a Nourish the Planet recipe, part of a collaborative series by Patricia Wells and Emily Buchanan.
© 2020 – All rights reserved. Please do not reproduce without permission.

Find our more here about why we created this series.

Nourish the Planet: Roasted Celery Root and Carrots with Tumeric, Black Mustard Seeds and Toasted Sesame Oil

 
Roasted celeriac and carrots-2.jpg
 

In our house, no festive meal is complete without a selection of hearty and flavorful vegetable dishes. And this one most definitely makes the cut for this year’s holiday menu. Here, the lesser known celery root (also called celeriac) and carrots are given a fragrant, spiced-up lift with a combination of black mustard seeds, turmeric and toasted sesame oil.

Beneath the rough and knobbly exterior of this exotic celery is a smooth white interior, with a delicate, clean flavor. Set against the sweet, caramelized notes of roasted carrot, these two make an elegant pair. Along with the bright lick of color from the turmeric, you have the perfect celebration food.

Cut into french-fry like batons the vegetables roast quickly, making this a high impact but low maintenance dish. So more time for putting your feet up by the fire with your loved ones!

Nourish zero waste note: Keep the scrubbed celery root peels for veggie scrap stock

Roasted Celery Root and Carrots with Tumeric, Black Mustard Seeds and Toasted Sesame Oil

4 servings   |   Equipment: An 8 1/2 by 12-inch (22 x 30 cm) gratin dish or baking tray

Ingredients

2 large carrots, about 10 ounces (300 g) total
1 small celery root, peeled, about 10 ounces (300 g) total
1 tablespoon black mustard seeds
2 teaspoons ground turmeric
½ teaspoon fine sea salt
About 6 tablespoons toasted sesame oil

Method

1.     Preheat the oven to 375° F (190°C). Arrange a rack in the center of the oven.

2.     Cut both vegetables into French fry-sized rectangles. In a large bowl, thoroughly toss the vegetables with the mustard seeds, turmeric and salt. Add the sesame oil, tablespoon by tablespoon, until the vegetables are thorougly coated.

3.     Transfer the coated vegetables to the gratin dish, in a single layer.

4.     Place in the oven and roast until the vegetables are cooked through but still have a bit of crunch. While roasting, toss the vegetables several times to keep them moist and evenly coated. Taste for seasoning. The vegetables are best served right from the oven, for they may soften and shrink as they cool.  


This is a Nourish the Planet recipe, part of a collaborative series by Patricia Wells and Emily Buchanan.
© 2020 – All rights reserved. Please do not reproduce without permission.

Find our more here about why we created this series.